
Getting Started
Three Ways to Set Up Your EasePi-R1
The EasePi-R1 comes with iStoreOS 24.10 preinstalled. Before you set it up, decide what role it will play on your home network. That determines which port you use to connect it to your network and how you find the IP address for the iStoreOS admin interface.
After powering on the R1, check the front-panel LEDs. When the RUN and PWR LEDs are both steadily lit, the R1 has finished booting and is running normally. Wait for both lights to turn steady before opening the admin interface or running the Network Wizard.
Choose Your Setup
| What you want to do | Setup | R1 uplink port | Admin IP address |
|---|---|---|---|
| Have the R1 handle your broadband connection and manage your home network | Main router | WAN | Default IP 192.168.100.1 |
| Keep your existing main router and let some or all devices use the R1 as needed | Bypass router | WAN during setup, then LAN after saving | The static IP set by the bypass router wizard |
| Use the R1 for storage, downloads, or home server applications | NAS or home server | WAN | The IP your existing router assigns to the R1's WAN port |
Option 1 — Use the R1 as Your Main Router
Choose this setup if you want the R1 to do any of the following.
- Establish your broadband connection using PPPoE.
- Assign IP addresses to your devices using DHCP.
- Serve as the main gateway for your home network.
- Connect to a network switch, a wireless access point (AP), or a mesh Wi-Fi system.
Connect the LAN port on your fiber modem (ONT) to the R1's WAN port. Connect your computer, switch, or wireless access point to an R1 LAN port.
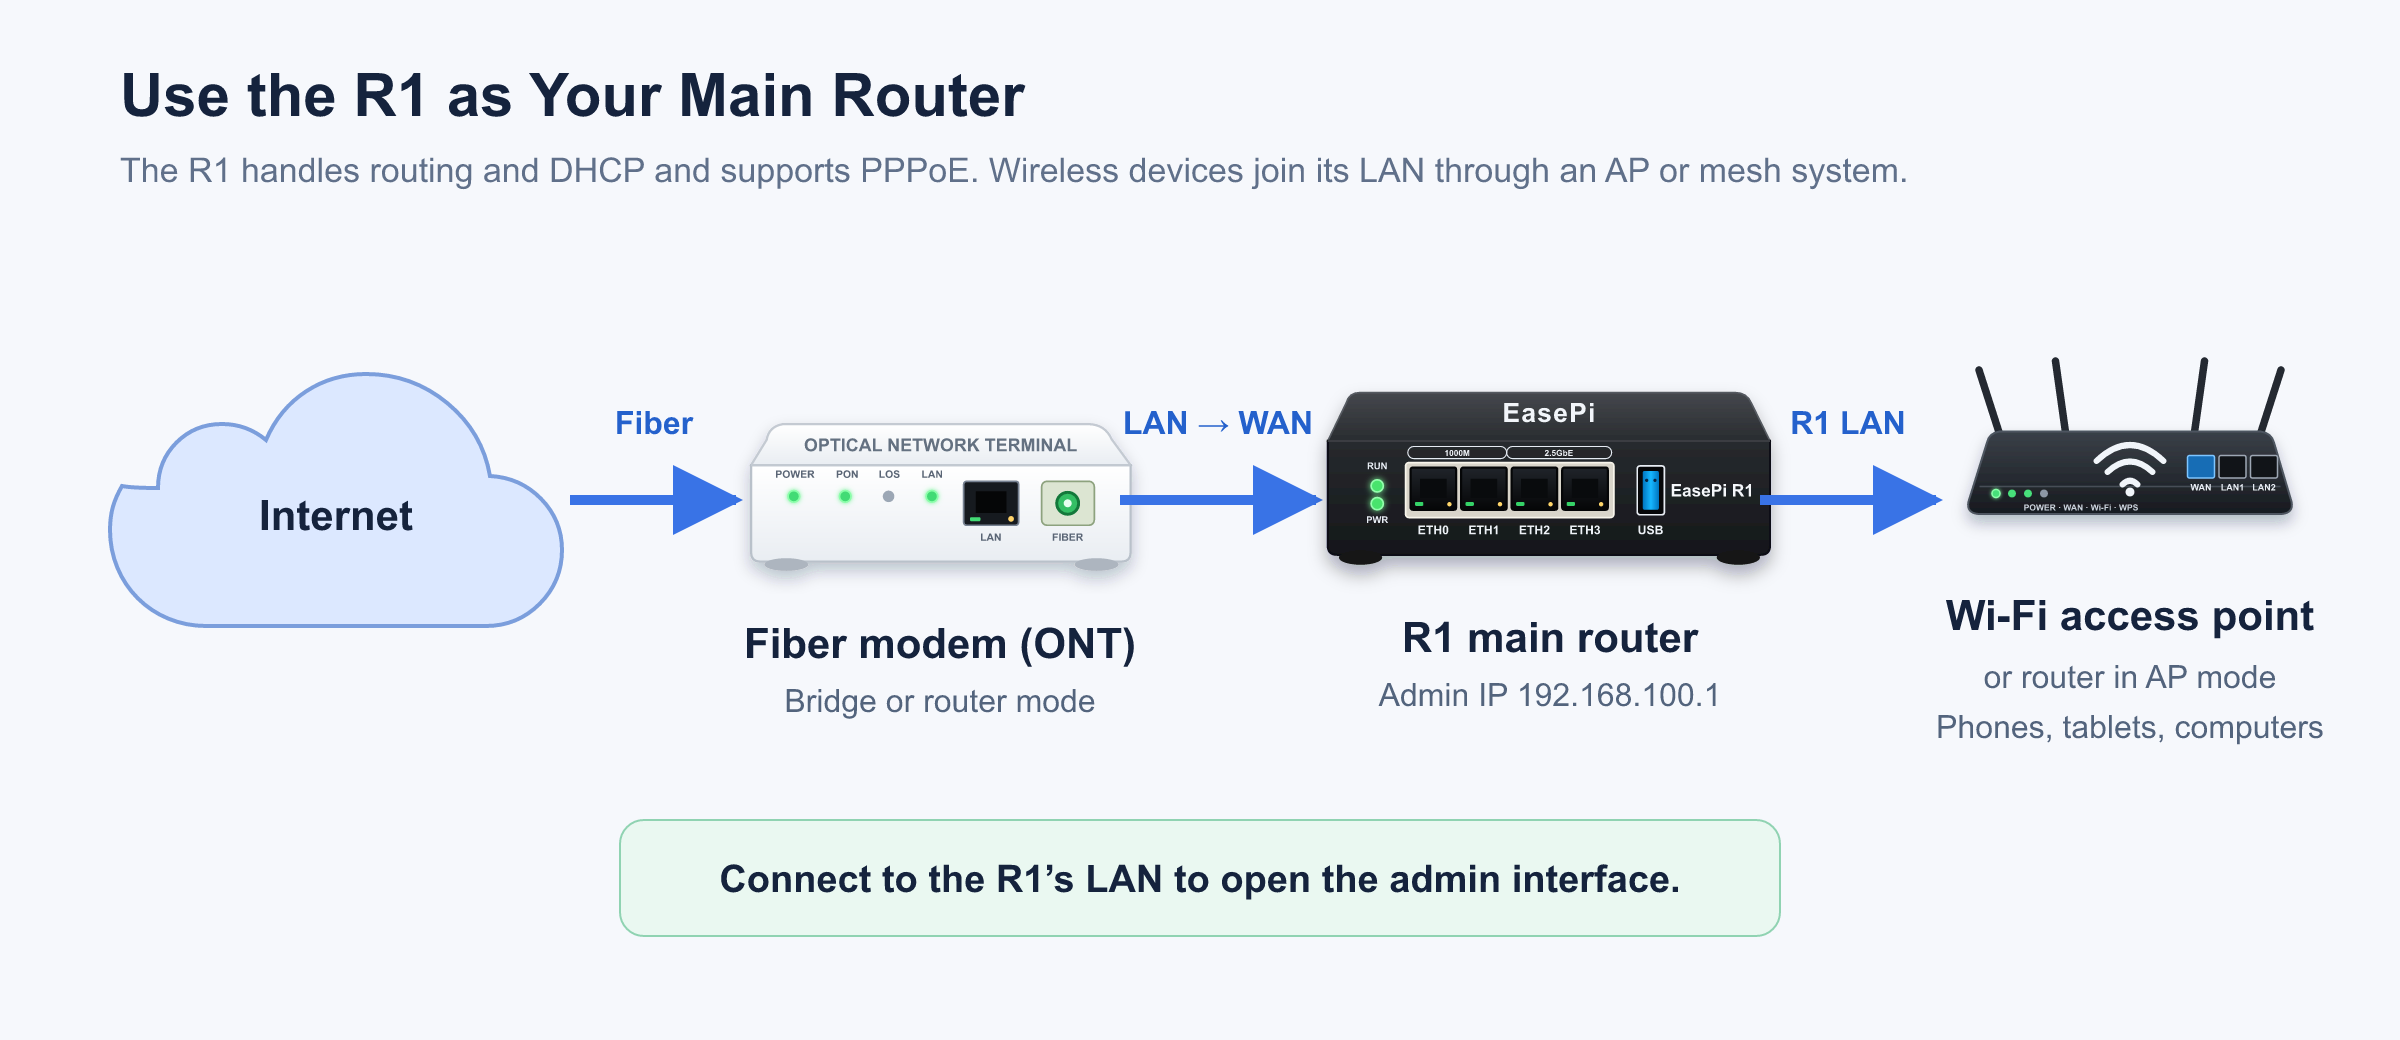
Once your computer or phone is on the R1's LAN, open http://192.168.100.1 in a browser.
For step-by-step instructions, see Main router setup — Connect your fiber modem, R1, and Wi-Fi router (Chinese).
Option 2 — Use the R1 as a Bypass Router
Choose this setup if:
- Your home internet and Wi-Fi are already working.
- You want to keep your current main router.
- You want to try the R1 with a few devices first.
- You want to minimize disruption to your existing network during setup.
Before running automatic setup, connect a LAN port on your existing main router to the R1's WAN port. After saving the bypass router configuration, move the same Ethernet cable from the R1's WAN port to one of its LAN ports. Leave the other end connected to your existing router.
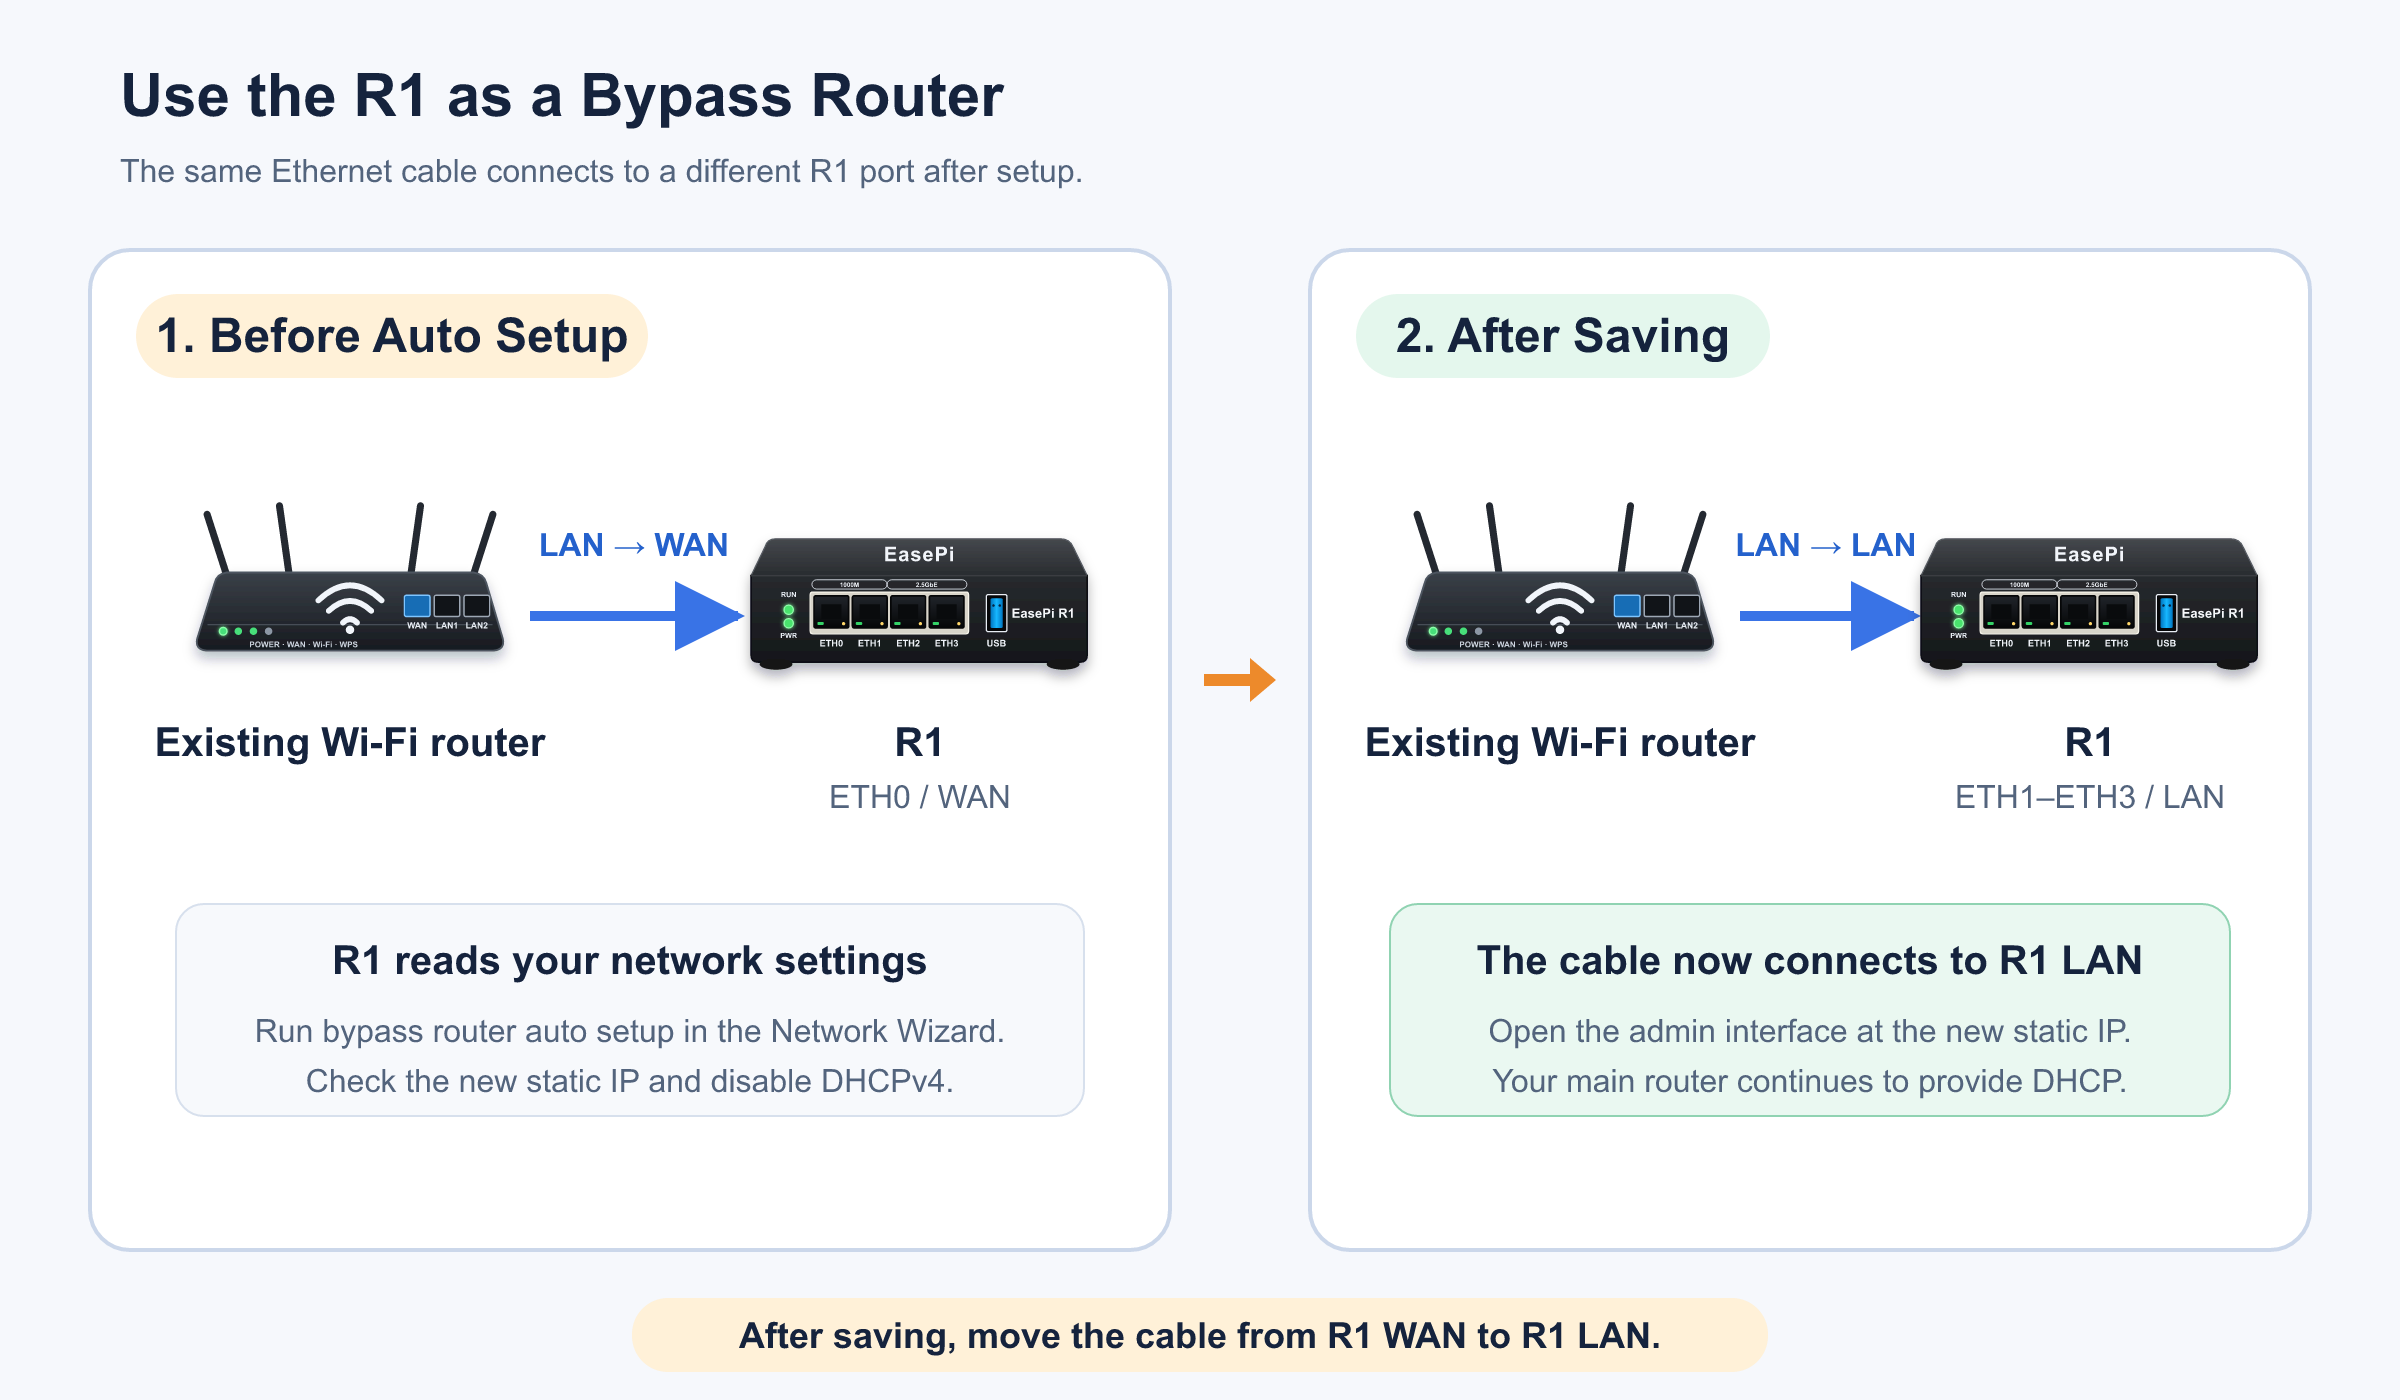
During setup, the R1 uses its WAN port to read the existing network settings. Once you save the configuration and move the cable to LAN, open the admin interface using the new static IP set by the wizard.
For step-by-step instructions, see Bypass router setup — Run automatic setup, disable DHCP, and save the new IP (Chinese).
Option 3 — Use the R1 as a NAS or Home Server
Choose this setup if:
- You mainly want file storage, downloads, or other home server applications.
- You want to keep your existing home network as it is.
- You already have a reliable Wi-Fi router, mesh system, or fiber-to-the-room (FTTR) setup.
- You want to manage the R1 from your phone over your existing Wi-Fi.
Connect a LAN port on your existing main router to the R1's WAN port. Your main router continues to handle the internet connection, Wi-Fi, and DHCP. The R1 joins the network as a regular device.
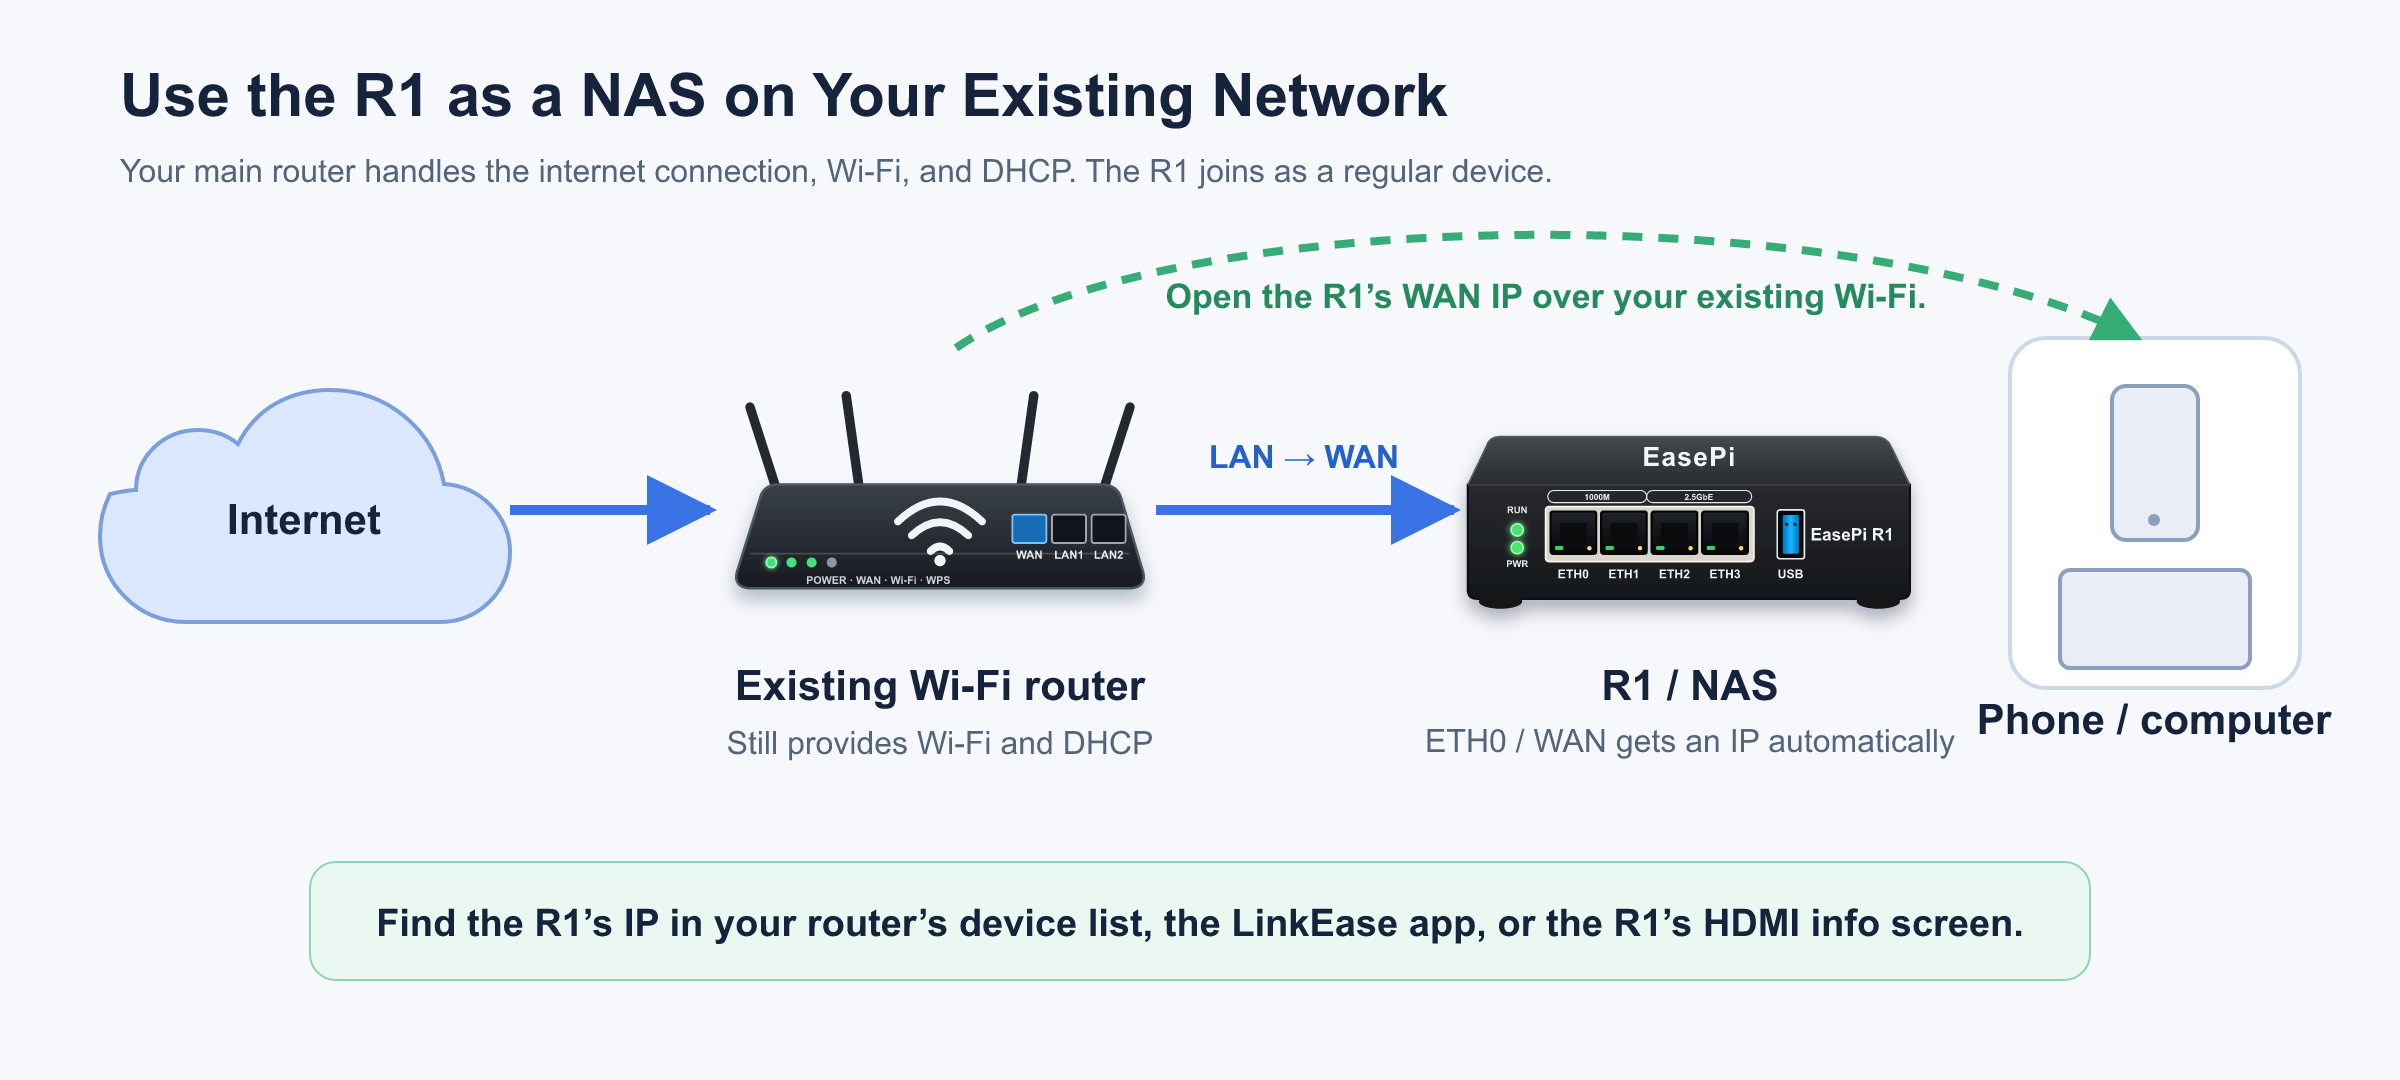
Your main router assigns an IP address to the R1's WAN port. The firmware that ships with the R1 allows devices on your existing local network to reach the admin interface through that port by default. Keep your phone connected to your existing Wi-Fi and open the R1's WAN IP address in a browser to access iStoreOS.
For step-by-step instructions, see NAS setup — Join your existing network and open the admin interface (Chinese).
Still Deciding? Connect a Computer Directly
Use an Ethernet cable to connect your computer to any LAN port on the R1. You can do this with the R1 disconnected from your fiber modem and existing router.
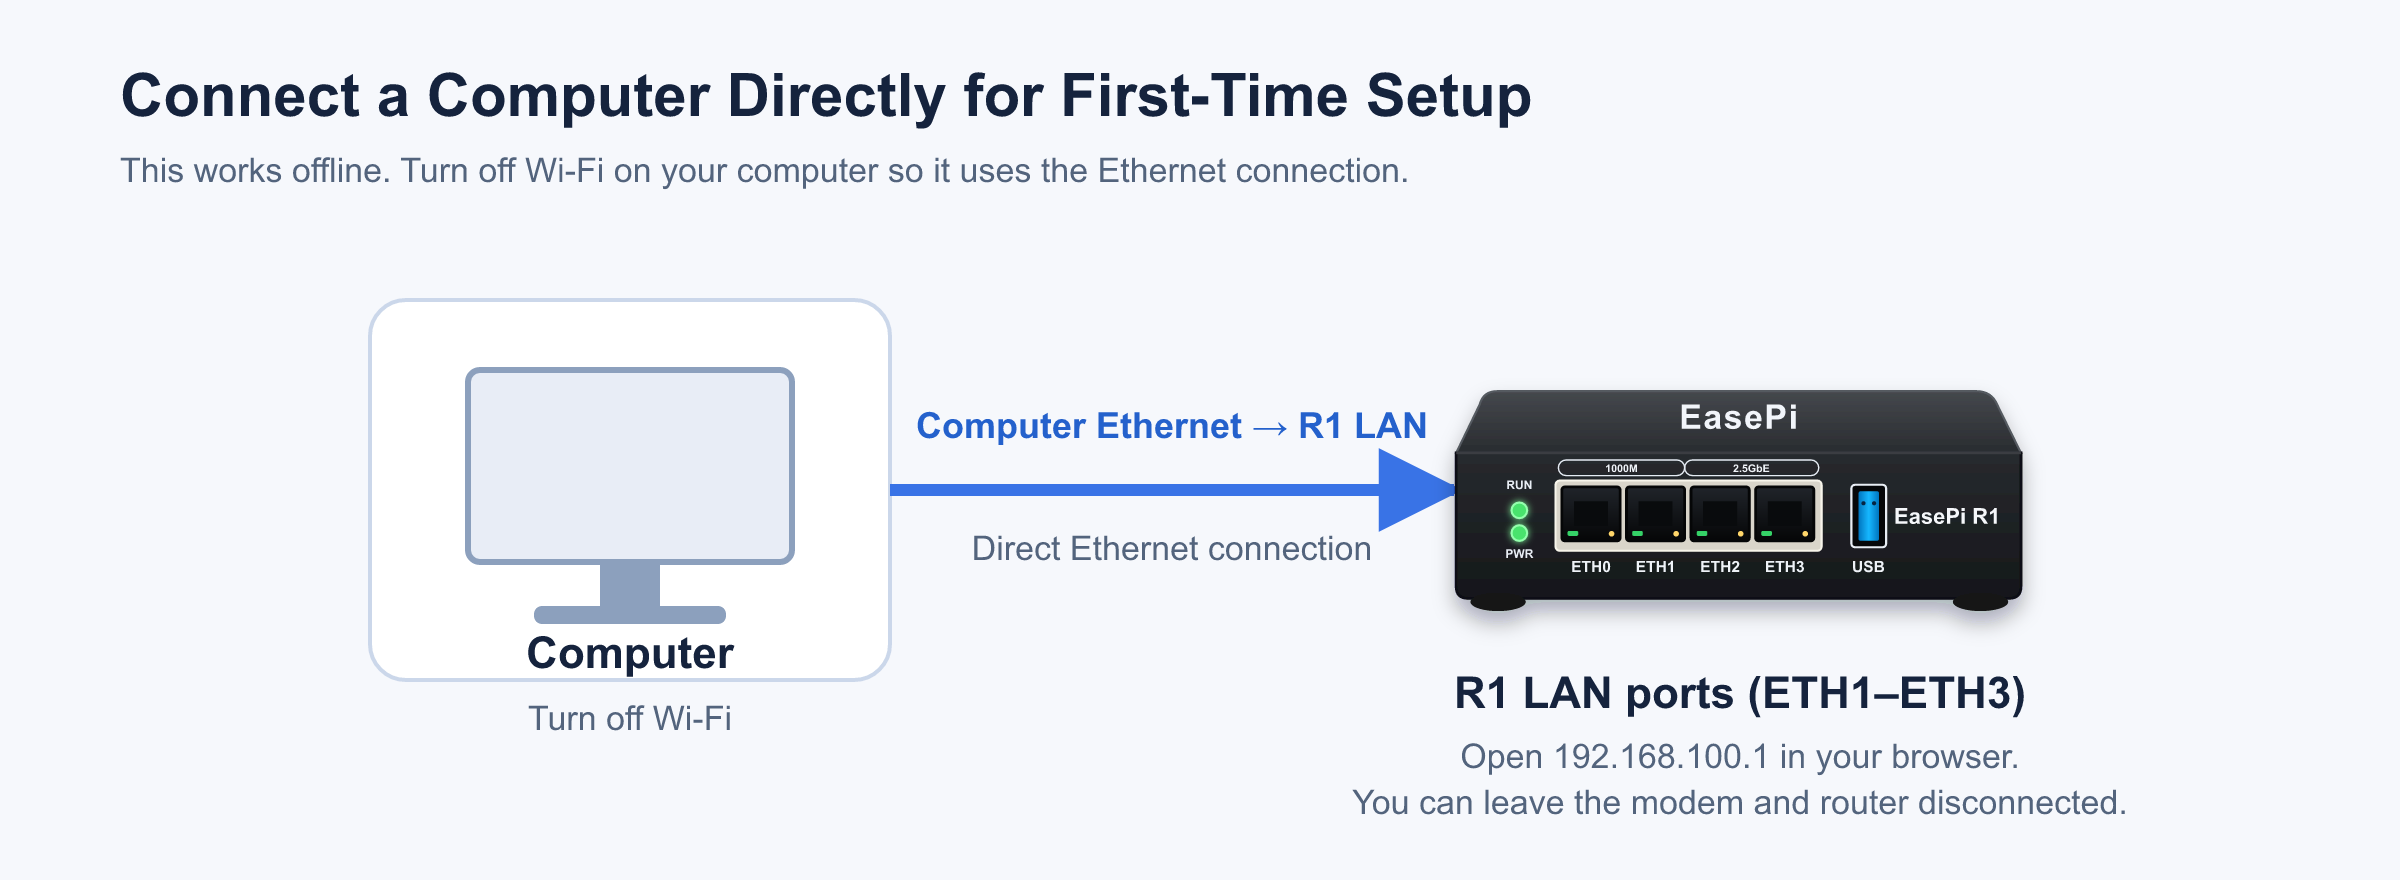
Temporarily turn off Wi-Fi on your computer and open http://192.168.100.1 in a browser. After signing in, open the Network Wizard.
Use root as the username and leave the password field blank. If that fails, try password. Set a new admin password after your first sign-in.
Next Steps
- Main router setup — Connect your fiber modem, R1, and Wi-Fi router (Chinese)
- Bypass router setup — Run automatic setup, disable DHCP, and save the new IP (Chinese)
- NAS setup — Join your existing network and open the admin interface (Chinese)
- Four ways to find the R1's admin IP (Chinese)
- EasePi-R1 FAQs (Chinese)