
Connect the EasePi-R1 as a NAS or Home Server
For file storage, downloads, or other home server applications, the simplest setup is to connect the EasePi-R1 as a regular device on your existing network.
- Your existing router continues to handle the broadband connection, Wi-Fi, and DHCP.
- The R1 joins the existing network through its WAN port.
- Phones and computers stay on your existing home network.
Connect the R1 to Your Existing Router
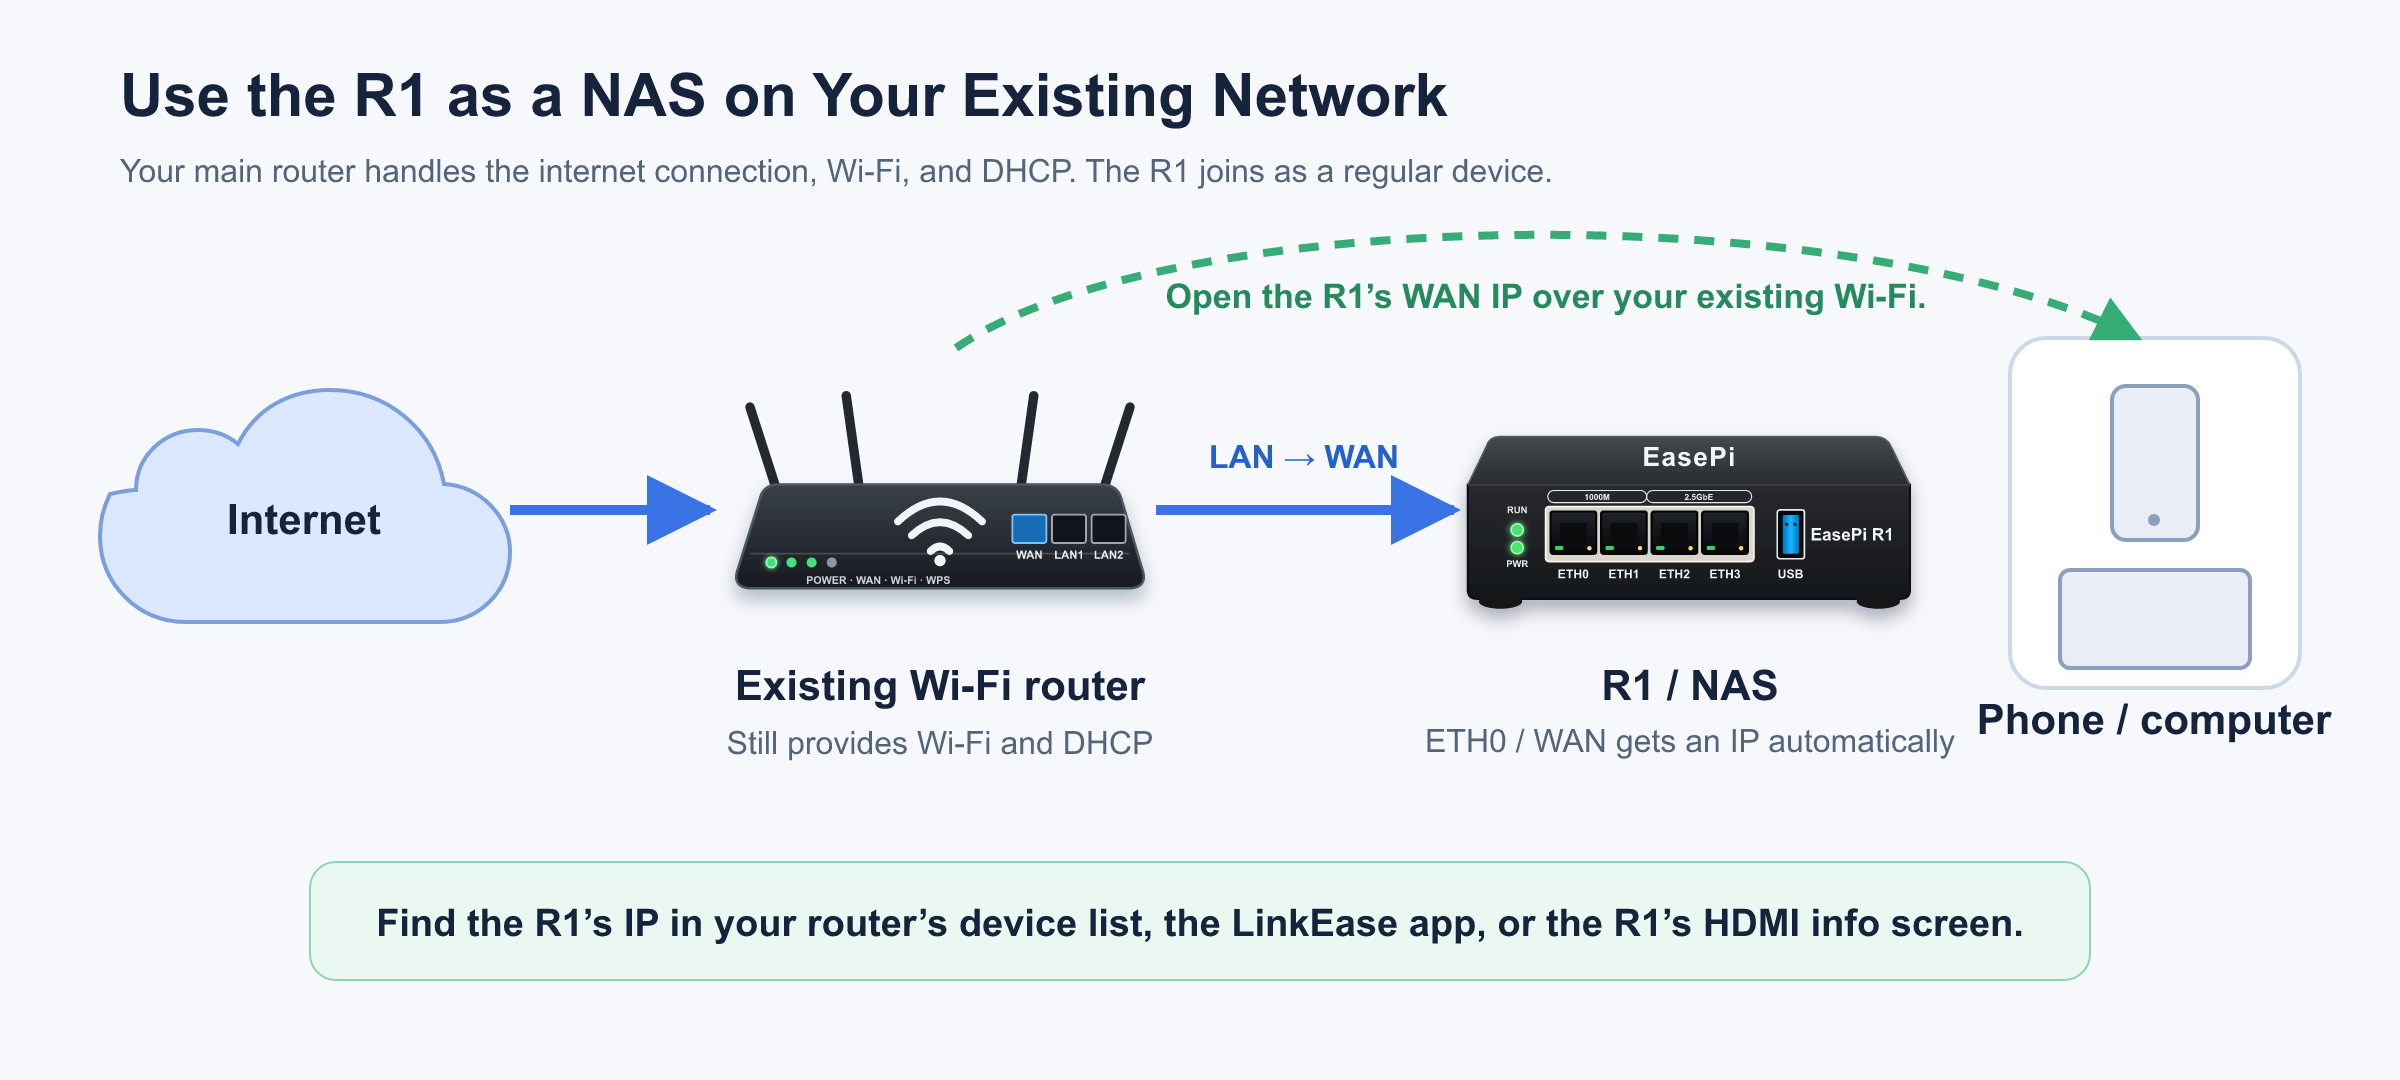
- Keep your existing router and Wi-Fi running.
- Connect a LAN port on your main router to the R1's
ETH0/WAN. - Power on the R1. Both the
RUNandPWRLEDs should be steadily lit when it has finished booting and is running normally. - Keep your phone and computer on your existing network.
- Find the IP address your main router assigned to the R1's WAN port.
- Open that address in a browser.
- Enter
rootas the username and leave the password field blank. If that fails, trypassword. - Open the Network Wizard and choose the option to connect to an existing router.
The iStoreOS 24.10 firmware that ships with the R1 allows devices on your existing local network to access the admin interface through the R1's WAN port by default. You can manage the R1 from your phone or computer over that network.
Find the IP Address Assigned to the R1
Check Your Main Router
Sign in to your existing router and open its Connected Devices, Device Management, or DHCP Clients page. Look for a newly connected wired device. Confirm its identity using the R1's device name or MAC address.
Use the LinkEase App
Connect your phone to the same local network as the R1, then use the LinkEase app to scan for the device.
Check the HDMI Output
Connect the R1 to a monitor or TV. The information screen shows the R1's IP addresses and network interfaces. Use the address shown for WAN.
If Your Main Router Has No Free LAN Ports
Add a standard Ethernet switch. Connect a LAN port on your main router to the switch, then connect the switch to the R1's ETH0/WAN.
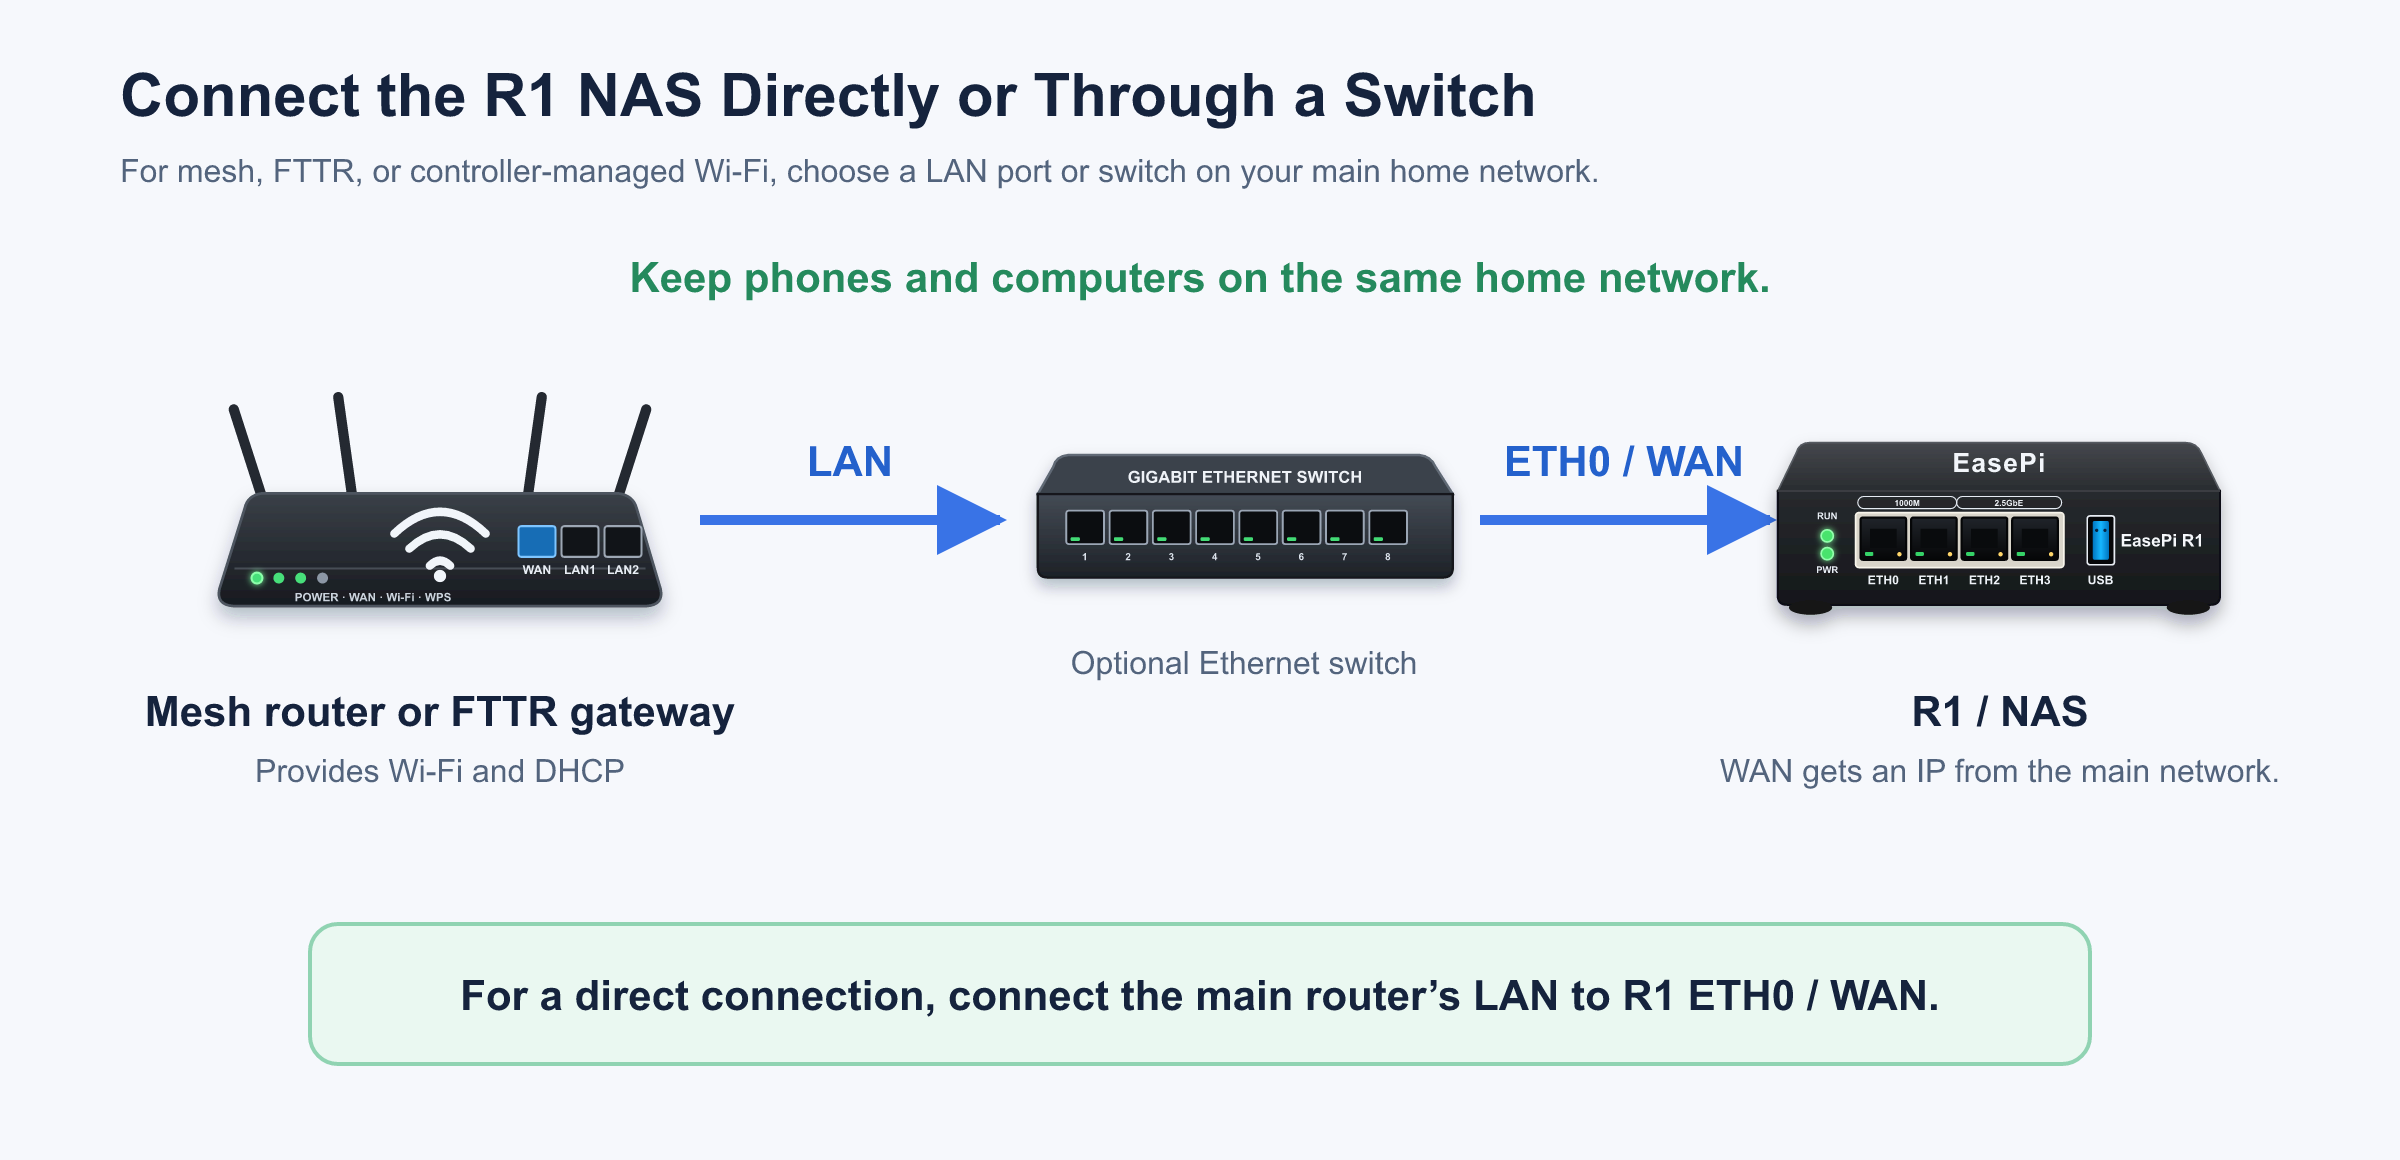
A standard Ethernet switch works for initial setup. If you later want faster transfers between your computer and the R1, check that the computer's network adapter, the switch, the Ethernet cable, and the R1 port all support a 2.5 GbE connection.
If You Use Mesh Wi-Fi, FTTR, or Controller-Managed Access Points
Connect the R1 to a LAN port or Ethernet switch on the main home network. You can also connect a LAN port on your main mesh router, FTTR gateway, or home router directly to the R1's ETH0/WAN.
Place the R1 anywhere with a wired connection to that network. A phone or computer can open the R1's admin interface as long as both devices are on the same home network and are allowed to communicate.
Use your main home Wi-Fi. Guest Wi-Fi, client isolation, and some VLAN settings can block access to local devices.
If You Already Have Two Routing Layers
Both layouts below can provide internet access. Where you connect the R1 affects whether your phone can discover it locally.
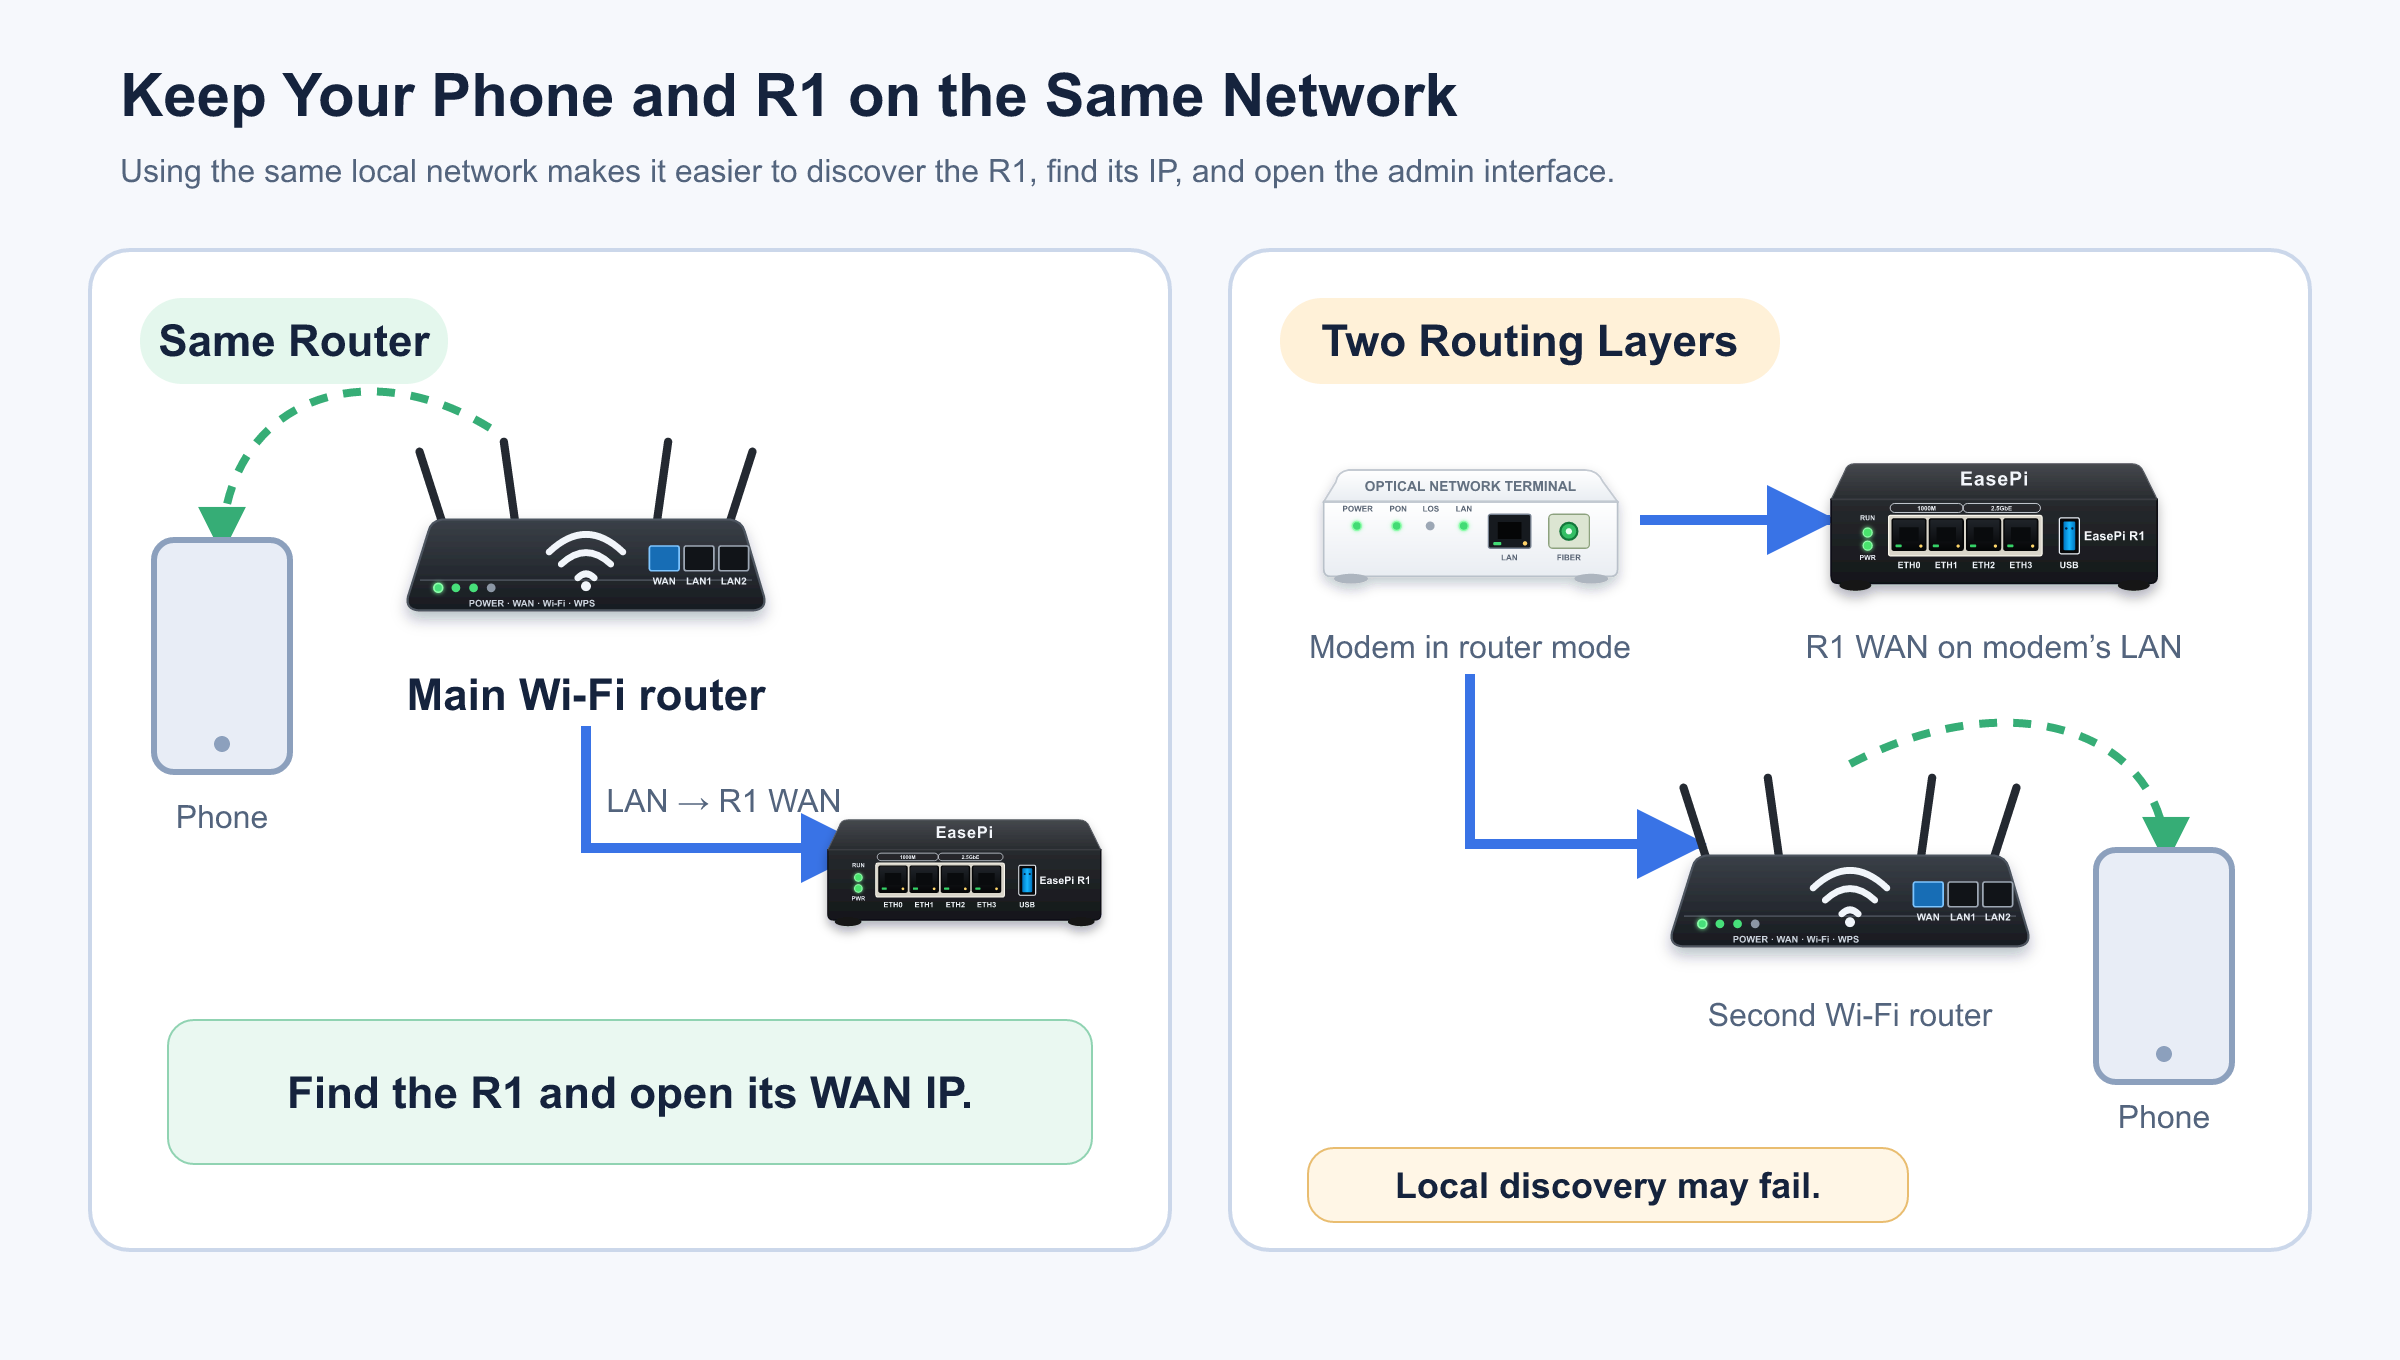
Whenever possible, connect the phone and the R1 through the same router. If the R1 is connected to your fiber modem and your phone is connected to a second router's Wi-Fi, both devices may get online while local discovery or access to the R1's admin interface still fails.
Check Your Setup
- The
RUNandPWRLEDs are both steadily lit. - The R1's WAN port is connected to your main router or a switch.
- The R1's WAN port has an IP address on the existing network.
- Your phone or computer is connected to your main home network.
- You can open iStoreOS in a browser using the R1's WAN IP address.
- The R1 can access the internet through your existing router.
If you cannot find the R1's address, see Four ways to find the R1's admin IP.
If the admin interface opens but the R1 cannot get online, see EasePi-R1 FAQs.