
Set Up the EasePi-R1 as a Bypass Router
In bypass router mode, your existing main router keeps handling the broadband connection, Wi-Fi, and DHCP. The EasePi-R1 joins the existing local network.
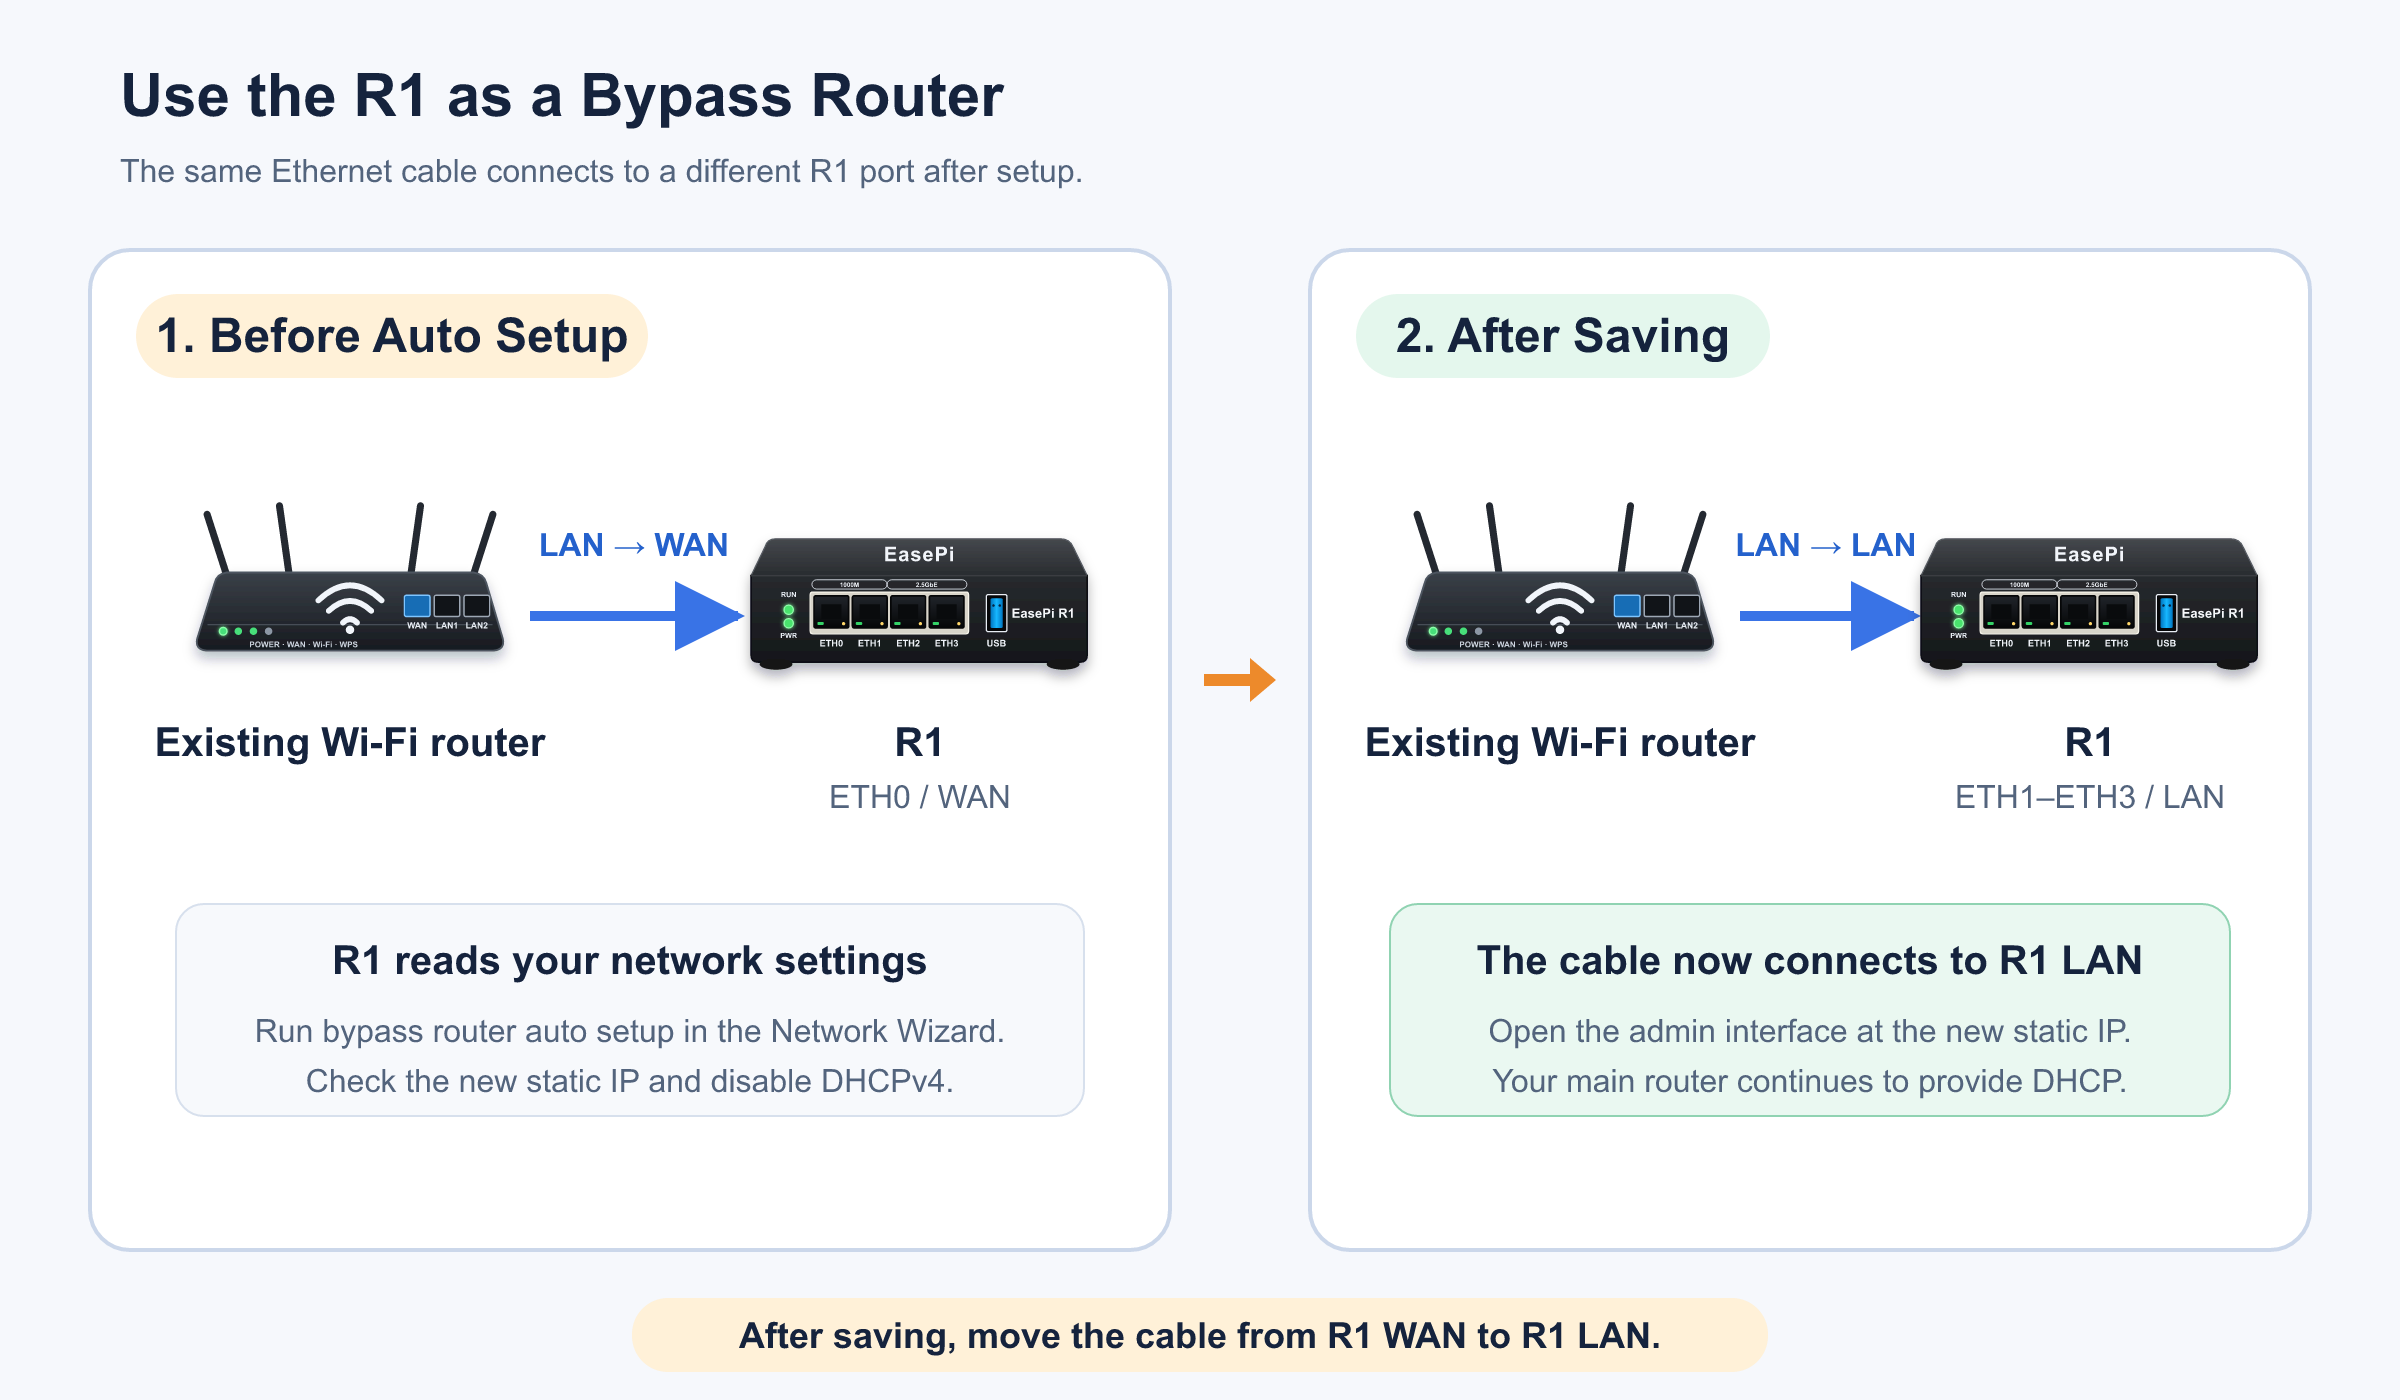
The wiring changes during setup. First, connect your main router's LAN port to the R1's WAN port. After saving the bypass router configuration, move the same Ethernet cable from the R1's WAN port to one of its LAN ports.
Step 1 — Connect the Main Router to R1 WAN
The left side of the diagram shows the initial connection. Your existing main router's LAN port connects to the R1's ETH0/WAN. Your phone and computer stay on your existing home Wi-Fi.
- Keep your existing main router connected to the internet.
- Connect a LAN port on your main router to the R1's
ETH0/WAN. - Power on the R1. Both the
RUNandPWRLEDs should be steadily lit when it has finished booting and is running normally. - Keep your phone connected to your existing Wi-Fi.
- Find the IP address your main router assigned to the R1's WAN port.
Check the main router's list of connected devices, scan using the LinkEase app, or check the R1's HDMI information screen.
The firmware that ships with the R1 allows devices on your existing local network to access the iStoreOS admin interface through the R1's WAN port by default. Open the assigned IP address in a browser. Enter root as the username and leave the password field blank. If that fails, try password.
Step 2 — Run Automatic Bypass Router Setup
- In iStoreOS, open the Network Wizard.
- Choose bypass router mode.
- Start automatic configuration.
- Select Refresh and wait for the R1 to detect the upstream IPv4 settings.
- Check the IP address, subnet mask, gateway address, and DNS servers.
- Use the auto-fill option.
- Check the suggested static IP address for the R1.
- Turn off DHCPv4 service on the R1.
- Save the configuration.
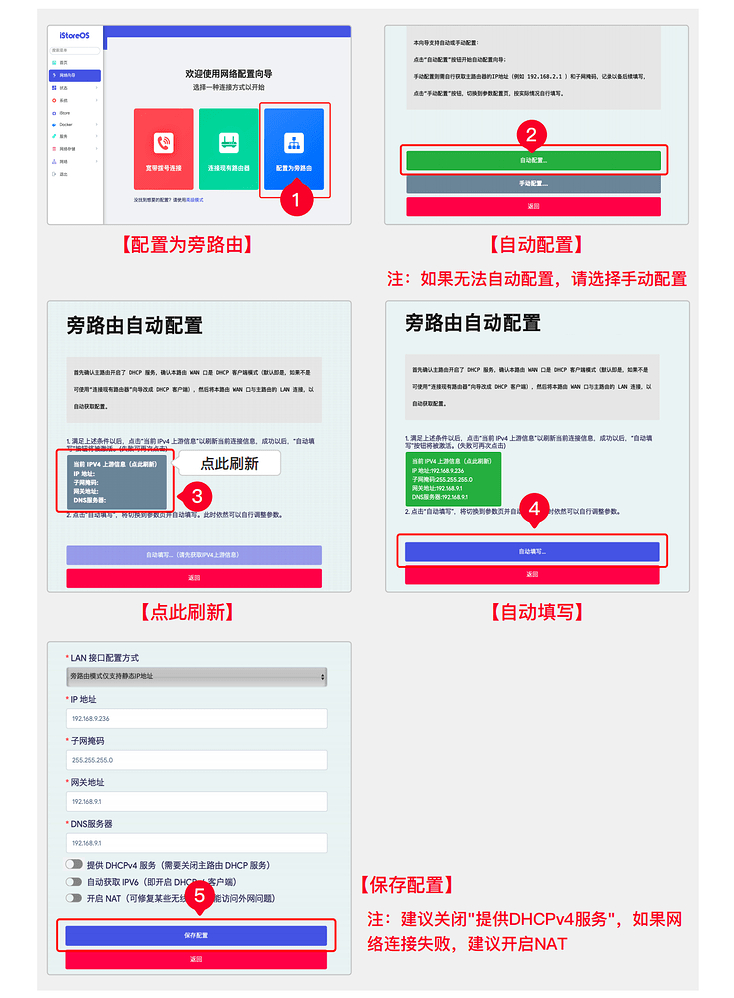
The R1's static IP address must be on the same subnet as your existing main router and available for the R1 to use. For example, if your main router is at 192.168.9.1, you could use 192.168.9.236 if it is on the same subnet and unassigned. Choose an address that fits your own network.
If your main router supports DHCP reservations, you can reserve the address for the R1 to reduce the chance of a future address conflict.
Start with NAT disabled. If devices using the R1 as their gateway have trouble getting online after setup, you can test enabling NAT.
If automatic setup cannot detect your network, switch to manual configuration and enter the R1's static IP address, subnet mask, main router's gateway address, and DNS servers.
Step 3 — Move the Cable from WAN to LAN
After saving the configuration, follow these steps.
- Unplug the Ethernet cable from the R1's WAN port.
- Plug that same cable into any LAN port on the R1. Leave the other end connected to your main router's LAN.
- Wait for the network connection to come back up.
- Open the new static IP address in a browser.
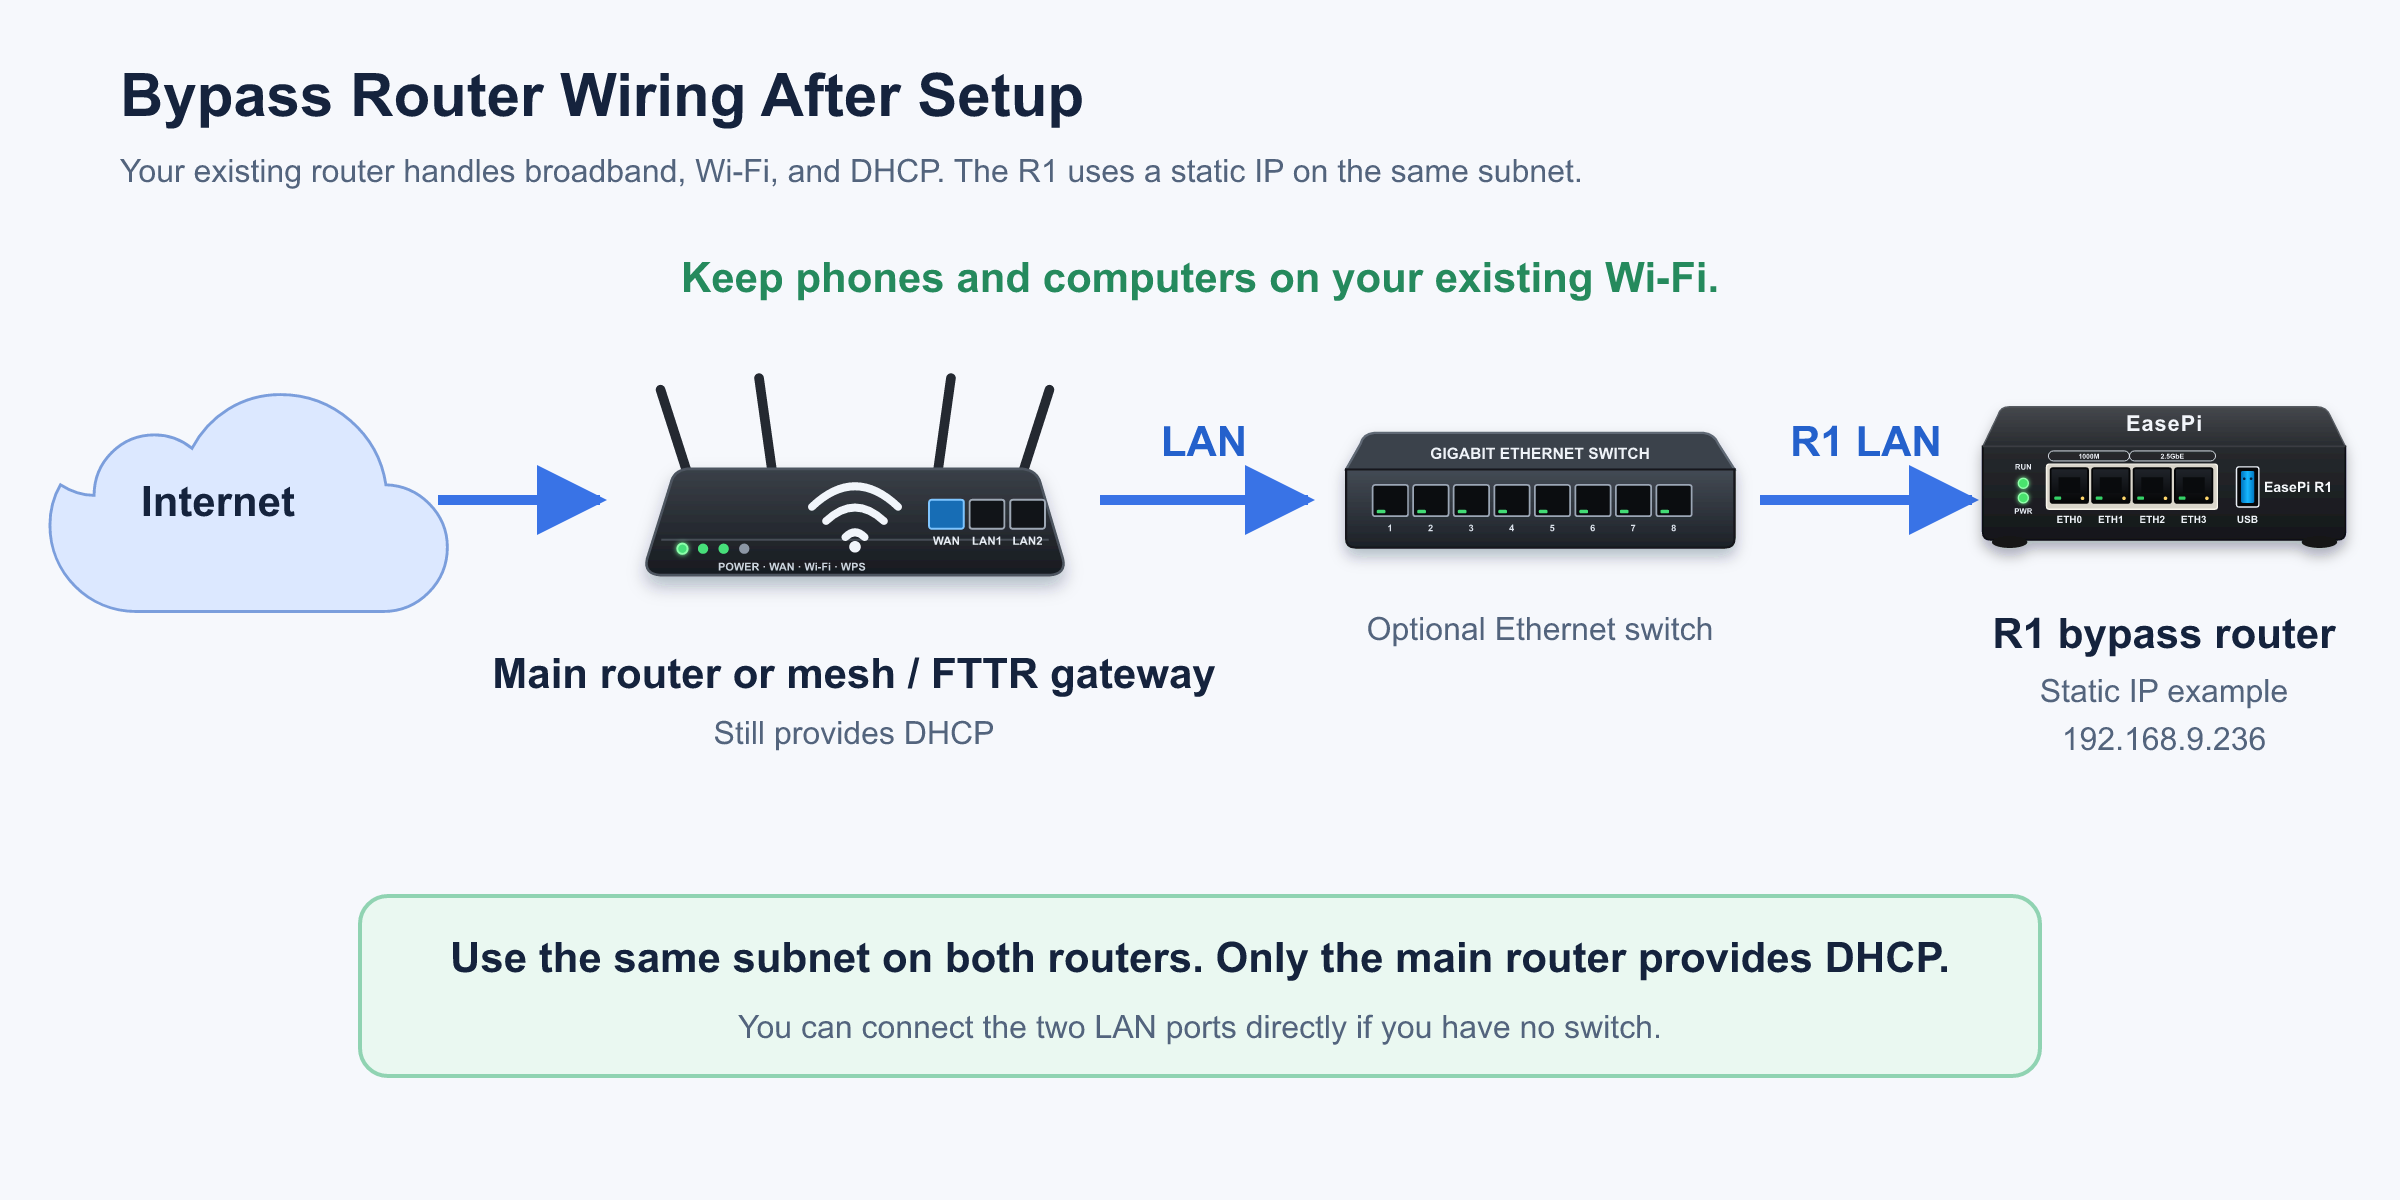
Your existing router still handles the broadband connection, Wi-Fi, and DHCP. The R1 joins the same home network through its LAN port and uses its new static address.
If You Have a Switch, Mesh Wi-Fi, or FTTR
After setup, connect the R1's LAN port to your main router's LAN or to a standard Ethernet switch on the same network. In a mesh or fiber-to-the-room (FTTR) setup, choose a LAN port or switch that carries your main home network.
Use Wi-Fi that can reach devices on your home LAN. Guest Wi-Fi, client isolation, AP isolation, and VLAN isolation can prevent access to the R1.
Check Your Setup
- The
RUNandPWRLEDs are both steadily lit. - Your existing main router still provides DHCP.
- DHCPv4 service on the R1 is disabled.
- The R1 has an unused static address on the existing subnet.
- The Ethernet uplink has moved from the R1's WAN port to an R1 LAN port.
- You can open the admin interface at the new static IP address.
Once the R1 is online, you can separately configure a single device or your whole home network to use it as a bypass router.
If you cannot find the new address, see Four ways to find the R1's admin IP.