
Four Ways to Find the EasePi-R1's Admin IP Address
The EasePi-R1's admin IP address depends on how you connected it. If you cannot open the admin interface, identify the R1's role on your network first, then choose the corresponding method below.
Both the RUN and PWR LEDs on the front panel should be steadily lit when the R1 has finished booting and is running normally. If either LED is off or blinking, check the power connection or wait for the R1 to finish starting up.
Which IP Address Should You Use?
| R1 setup | Admin IP address |
|---|---|
| Main router, or computer connected directly to R1 LAN | Default IP 192.168.100.1 |
| NAS or home server with WAN connected to an existing router | The IP your existing router assigns to the R1's WAN port |
| Bypass router after setup | The new static LAN IP saved in the bypass router wizard |
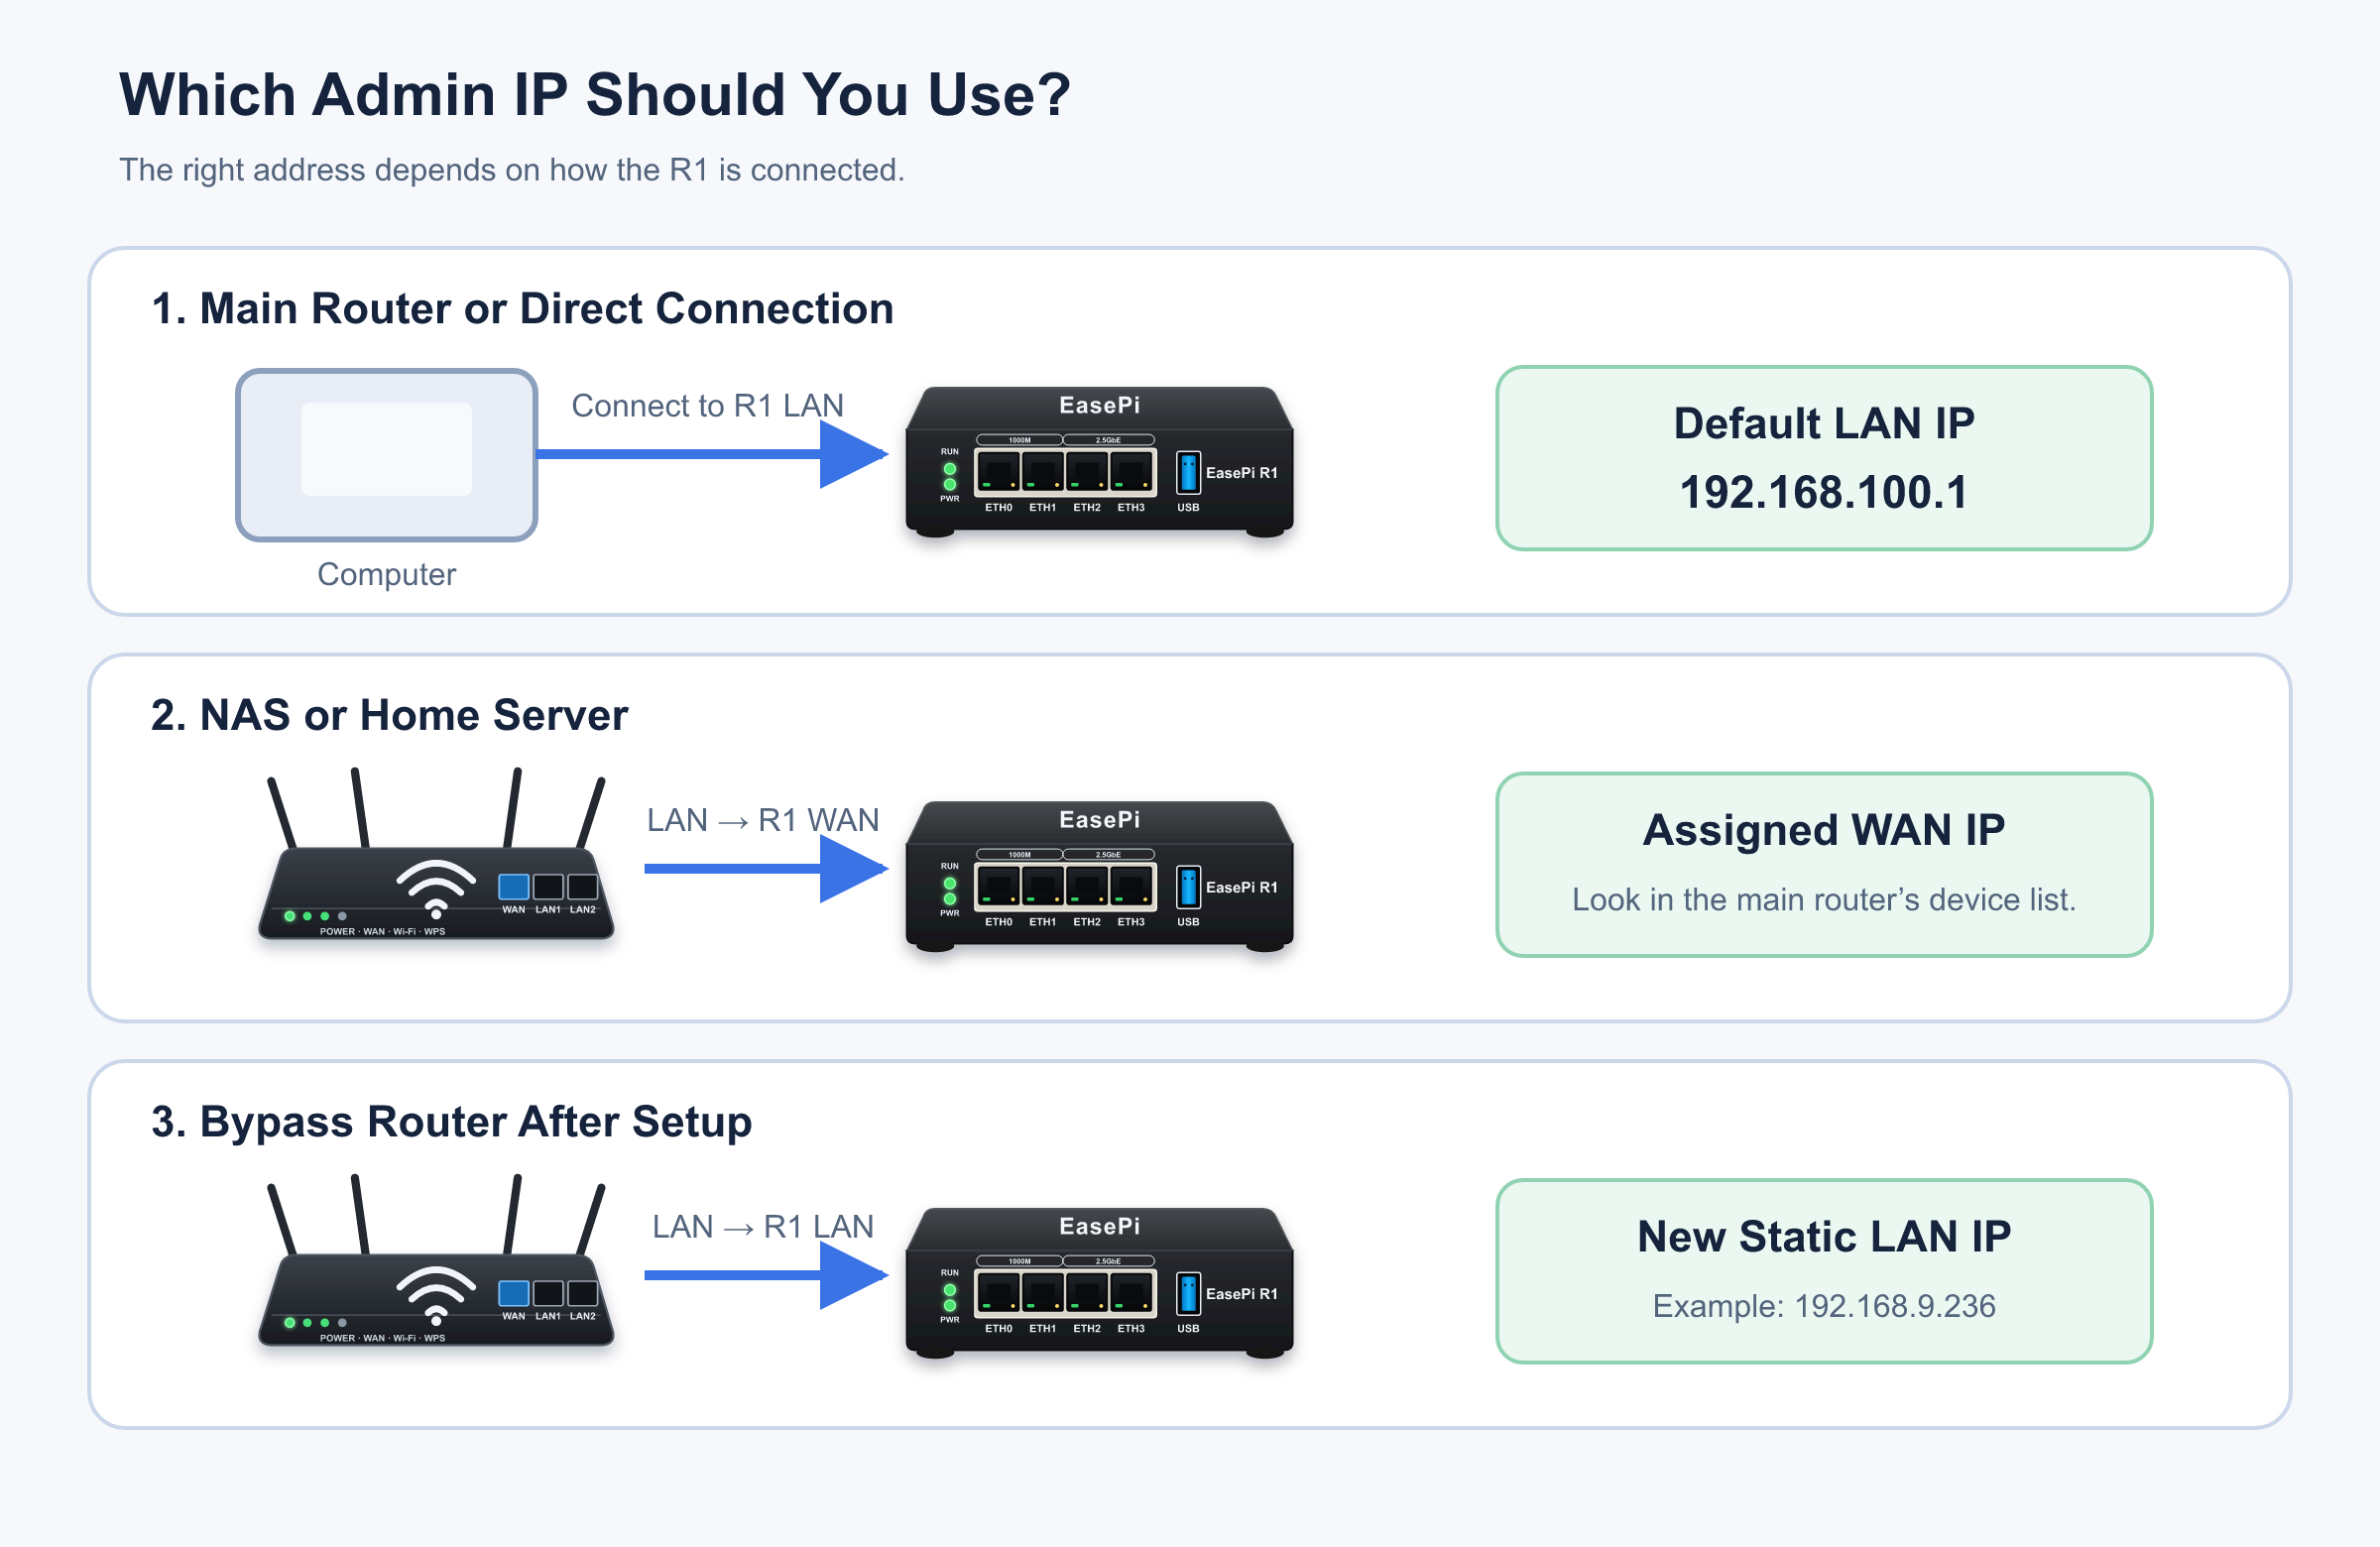
Method 1 — Open the Default LAN Address
Use this method if the R1 still has its default LAN address and your phone or computer is on its LAN. This includes a computer connected directly to an R1 LAN port and devices on the home network when the R1 is the main router.
Open this address in your browser.
http://192.168.100.1Enter root as the username and leave the password field blank. If that fails, try password.
If your existing main router also uses 192.168.100.1, connect a computer directly to the R1's LAN with the two networks separate. Change the R1's LAN address or run the Network Wizard before joining the networks.
Method 2 — Check Your Main Router's Device List
Use this method when the R1's WAN port connects to an existing network. This includes using the R1 as a NAS or home server, preparing for automatic bypass router setup, and connecting behind a fiber modem in router mode or an existing main router.
- Sign in to your existing main router.
- Open Connected Devices, Device Management, DHCP Clients, or the equivalent page.
- Look for a newly connected wired device.
- Confirm its identity using the R1's device name or MAC address.
- Open the assigned IP address in a browser.
The iStoreOS 24.10 firmware that ships with the R1 allows devices on the upstream local network to open the admin interface through the R1's WAN port by default.
Method 3 — Scan with the LinkEase App
When your phone and the R1 are on the same local network, use the LinkEase app to scan for the R1. A scan can fail for any of these reasons.
- Your phone is connected to guest Wi-Fi.
- Client isolation or AP isolation is enabled on the router.
- Your phone and the R1 are behind different routing layers.
- The R1's RUN and PWR LEDs have yet to turn steady.
- An Ethernet cable or network port has no active connection.
If the scan fails, check your main router's device list before considering a reset.
Method 4 — Check the HDMI Output
Connect the R1 to a monitor or TV to see its network information, including IP addresses and interface status.
The screen may show several interfaces. Use the address that matches your setup.
- Computer connected to R1 LAN — use the default LAN address.
- R1 WAN connected to an existing router — use the assigned WAN address.
- R1 configured as a bypass router — use the saved static LAN address.
If You Still Cannot Find the Address, Connect a Computer Directly
Connect your computer's Ethernet port to one of the R1's ETH1–ETH3/LAN ports. You can leave your fiber modem and main router disconnected.
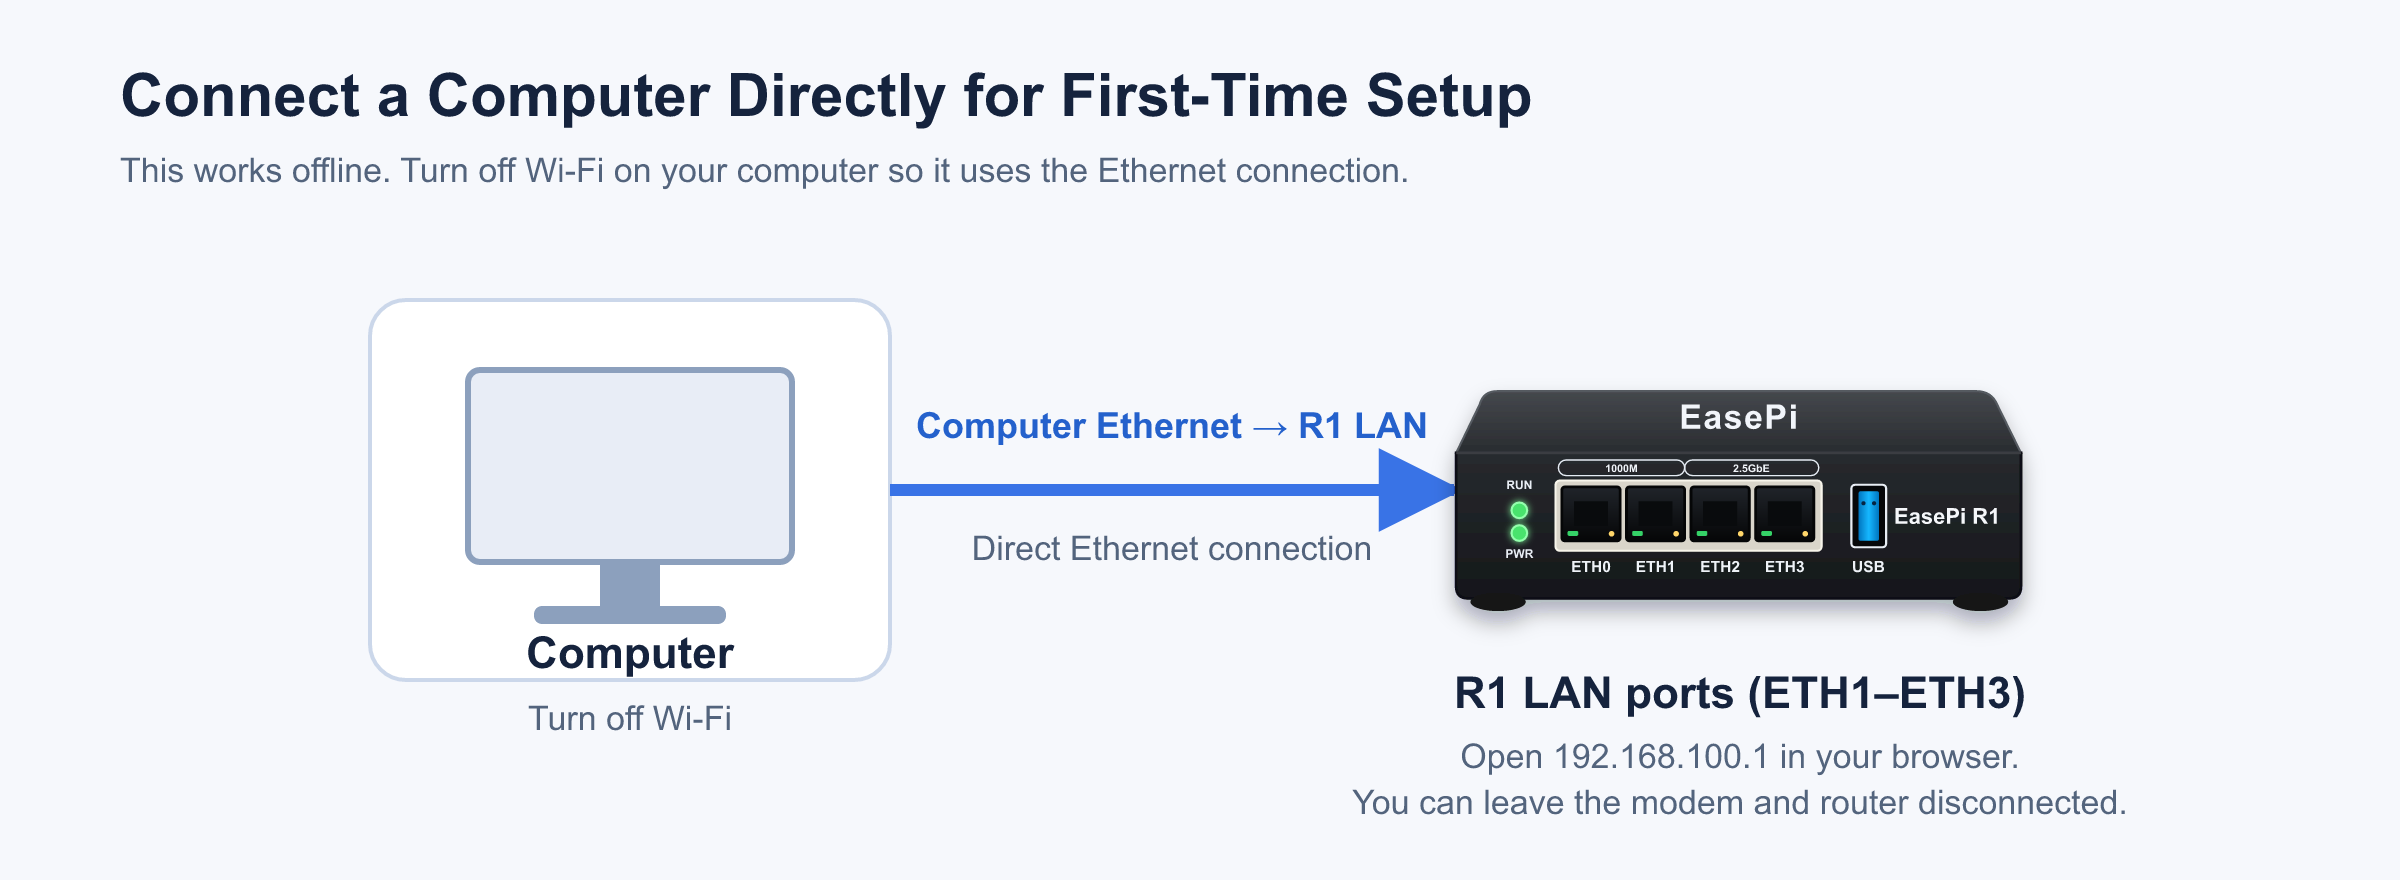
- Temporarily unplug the other Ethernet cables from the R1.
- Connect your computer to any LAN port on the R1.
- Temporarily turn off Wi-Fi on your computer.
- Wait for your computer to obtain an IP address automatically.
- Open
http://192.168.100.1in a browser.
If your computer does not receive an IP address automatically, you can temporarily enter these settings.
Computer IP address: 192.168.100.2
Subnet mask:         255.255.255.0
Gateway:             192.168.100.1
After you open the admin interface and finish setting up the R1, return your computer to automatic IP assignment.
If the Admin Interface Still Will Not Open
Check the following in order.
- Verify that the R1's RUN and PWR LEDs are both steadily lit.
- Check that the Ethernet cable is plugged into the correct port for your setup.
- Check that the port shows an active link.
- Connect your phone to your main home Wi-Fi.
- Check that your phone or computer and the R1 are on the same local network.
- If the R1 uses WAN, check that your main router has assigned it an IP address.
- Verify that the WAN IP, default LAN IP, or static bypass router IP you entered matches your setup.
- If you saved a bypass router configuration, check that you moved the uplink cable from the R1's WAN port to LAN.
- In bypass router mode, use the new static address saved during setup.
- Enter the full address in your browser, including
http://.
If the admin interface opens but your device cannot get online, see EasePi-R1 FAQs.